
There’s something about the name “Trailer Park Toad Bites” that instantly brings a smile to my face. It’s quirky, a little cheeky, and perfectly captures those fun, casual moments I’ve shared with my sister Ouma on lazy Sunday afternoons. We’d be sitting on the back porch, chasing lightning bugs, while Mama Lou’s kitchen filled the air with the scent of something crispy and golden. These bites may sound playful, but they carry the warmth of home and a sprinkle of nostalgia with every crunchy nibble. Today, I’m excited to share this recipe with you—not just for the taste, but for the memories they evoke and the joy they bring to any gathering.
Table of Contents
Why You’ll Love This Trailer Park Toad Bites
Trailer Park Toad Bites are a playful take on comfort food that’s easy to make and impossible not to love. Growing up, Mama Lou’s kitchen was the heart of our home, and these bites remind me of the simple joy found in sharing food with family. They’re crispy on the outside, tender and flavorful inside, with a hint of spice that keeps you coming back for more. What makes these bites really special is how adaptable they are—perfect for a quick snack, a party appetizer, or even a casual dinner when paired with a fresh salad.
Ouma and I first stumbled upon the inspiration for these bites during a family reunion. We were kids, running around the backyard, and Mama Lou surprised us with these little golden nuggets. She winked and called them Trailer Park Toad Bites, making us giggle. The name stuck, but more importantly, the flavors stayed with me. Making them today brings back that feeling of summer evenings filled with laughter and the magic of Mama Lou’s cooking.
Ingredients You’ll Need for This Trailer Park Toad Bites

- 2 cups all-purpose flour
- 1 teaspoon baking powder
- 1/2 teaspoon salt
- 1/2 teaspoon smoked paprika (substitute with regular paprika if unavailable)
- 1/4 teaspoon cayenne pepper (optional, for a little heat)
- 1 cup buttermilk (or 1 cup milk mixed with 1 tablespoon lemon juice, let sit 5 minutes)
- 2 large eggs
- 1 pound bite-sized chicken pieces or firm mushrooms (for a vegetarian option)
- Vegetable oil for frying (can substitute with canola or peanut oil)
- 1 teaspoon garlic powder
- 1 teaspoon onion powder
- Fresh parsley, chopped, for garnish (optional but recommended—Mama Lou always added a little green!)
Nutrition Facts
- Calories: Approximately 280 per serving (about 6 pieces)
- Protein: 18g
- Fat: 12g
- Carbohydrates: 22g
- Fiber: 1.5g
- Sugar: 2g
- Sodium: 450mg

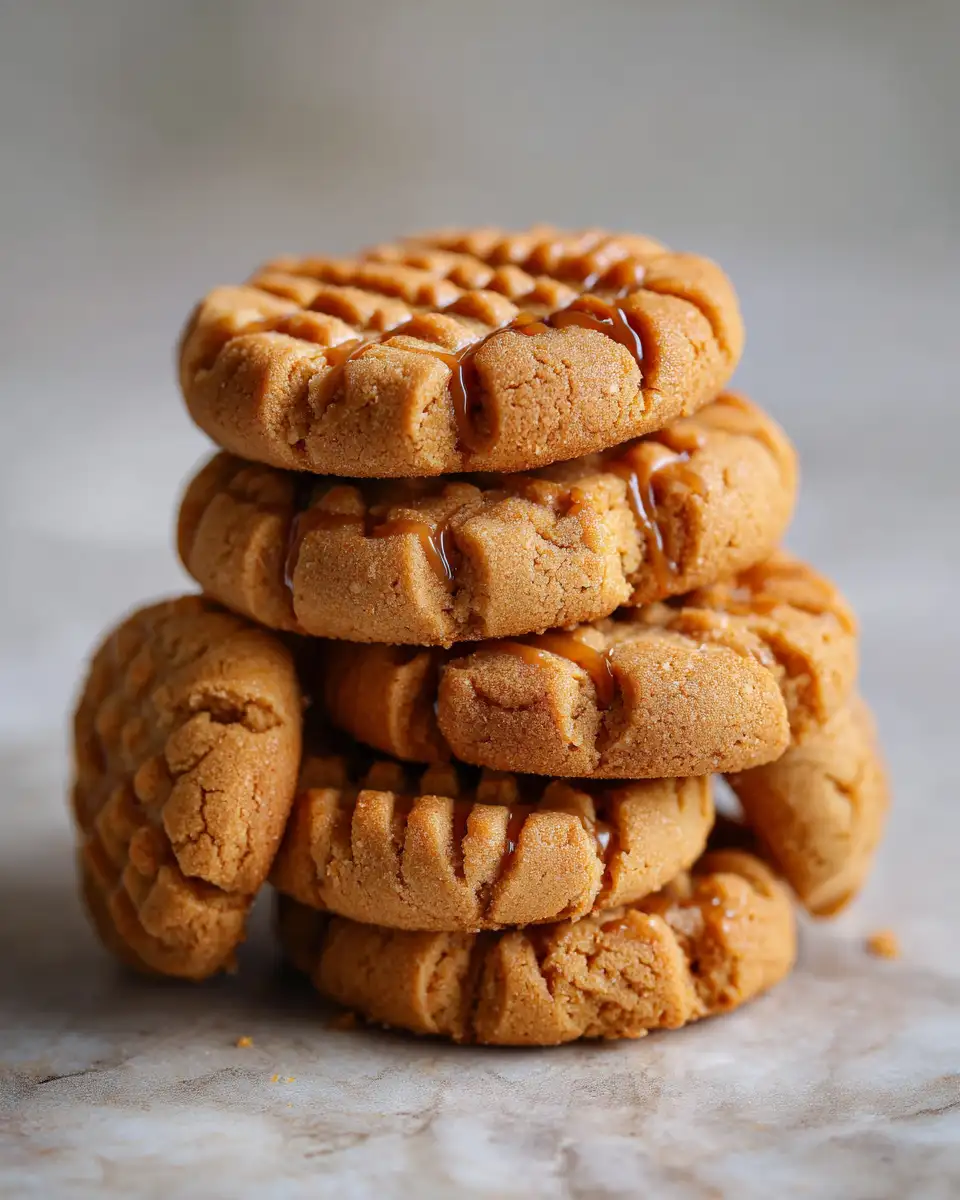
Discover the Irresistible Crunch of Trailer Park Toad Bites
Learn how to make delicious Trailer Park Toad Bites. Easy recipe with step-by-step instructions.
- Total Time: 45 minutes
- Yield: 4 servings 1x
Ingredients
- 2 cups all-purpose flour
- 1 teaspoon baking powder
- 1/2 teaspoon salt
- 1/2 teaspoon smoked paprika (substitute with regular paprika if unavailable)
- 1/4 teaspoon cayenne pepper (optional, for a little heat)
- 1 cup buttermilk (or 1 cup milk mixed with 1 tablespoon lemon juice, let sit 5 minutes)
- 2 large eggs
- 1 pound bite-sized chicken pieces or firm mushrooms (for a vegetarian option)
- Vegetable oil for frying (can substitute with canola or peanut oil)
- 1 teaspoon garlic powder
- 1 teaspoon onion powder
- Fresh parsley, chopped, for garnish (optional but recommended—Mama Lou always added a little green!)
Instructions
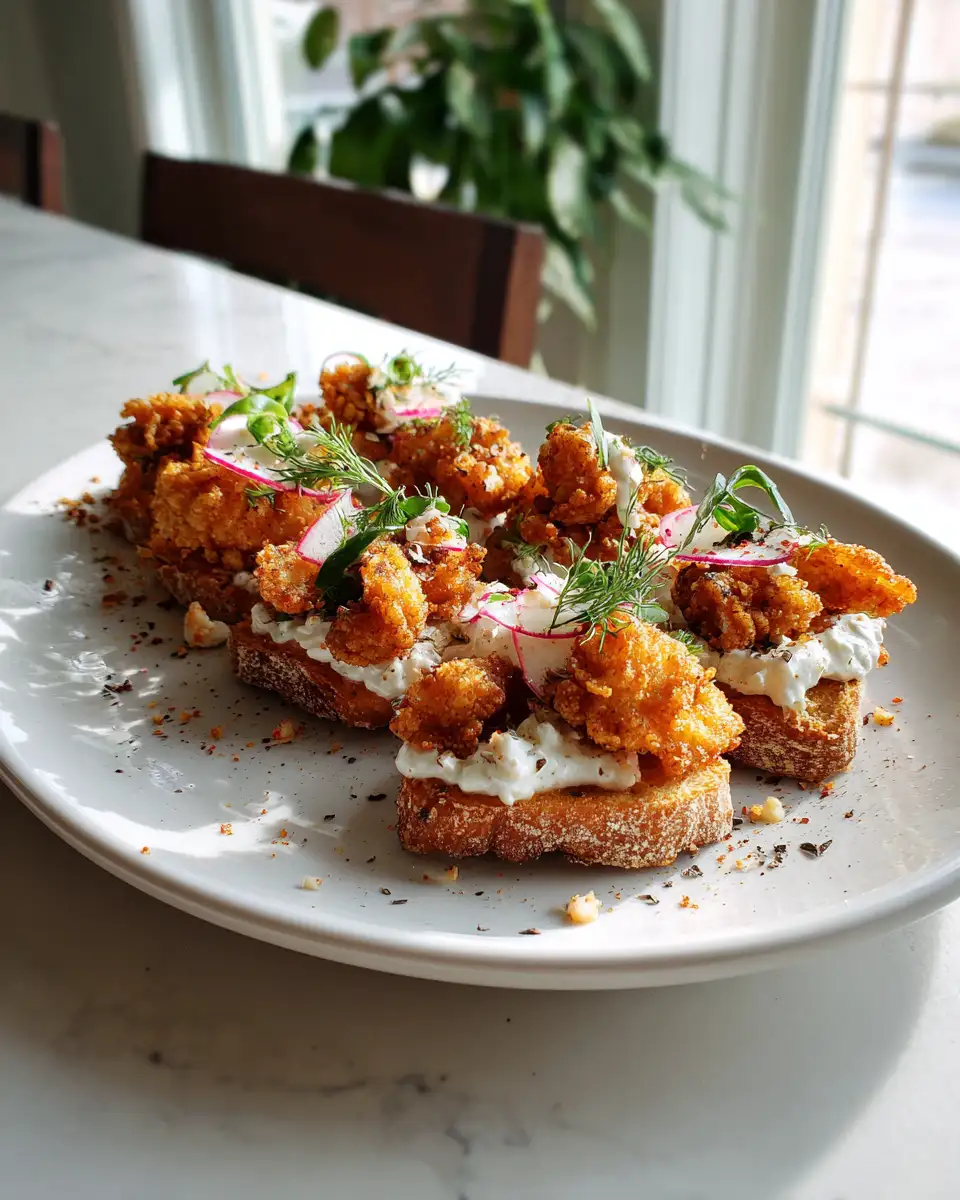
- Start by prepping your chicken or mushrooms. If using chicken, cut into bite-sized chunks about 1 inch wide. For mushrooms, clean and trim stems as needed. This is where Ouma and I would sneak a few bites before the cooking even began—those little morsels were irresistible raw!
- In a large bowl, whisk together the flour, baking powder, salt, smoked paprika, cayenne pepper, garlic powder, and onion powder. This dry mix is the secret to that perfect crust Mama Lou taught me about—seasoned right, it adds so much flavor.
- In a separate bowl, beat the eggs and mix in the buttermilk until well combined.
- Heat about 2 inches of vegetable oil in a deep skillet or heavy-bottomed pot over medium-high heat until it reaches 350°F (use a thermometer for best results). Mama Lou always warned me to be patient here—hot oil is the key to crispiness without greasiness.
- Dip each piece of chicken or mushroom into the wet mixture, then dredge thoroughly in the seasoned flour mixture. For the crispiest bite, repeat the wet and dry dip once more. This double coating was a trick Ouma discovered when she wanted an extra crunchy snack during movie nights.
- Carefully place the coated pieces into the hot oil, frying in small batches to avoid overcrowding. Cook for about 4-5 minutes, turning occasionally until golden brown and cooked through. Mushrooms will take slightly less time, about 3-4 minutes. Keep an eye on them—you want that perfect golden crunch.
- Remove the bites from oil with a slotted spoon and place them on a paper towel-lined plate to drain excess oil. Mama Lou would always say, “Pat ‘em dry, or the crunch won’t last.”
- Sprinkle with a little extra salt and fresh parsley before serving to add brightness and that homemade touch.
- Prep Time: 15 minutes
- Cook Time: 30 minutes
- Category: Main Dish
- Method: Cooking
- Cuisine: International
Steps to Create Your Trailer Park Toad Bites
- Start by prepping your chicken or mushrooms. If using chicken, cut into bite-sized chunks about 1 inch wide. For mushrooms, clean and trim stems as needed. This is where Ouma and I would sneak a few bites before the cooking even began—those little morsels were irresistible raw!
- In a large bowl, whisk together the flour, baking powder, salt, smoked paprika, cayenne pepper, garlic powder, and onion powder. This dry mix is the secret to that perfect crust Mama Lou taught me about—seasoned right, it adds so much flavor.
- In a separate bowl, beat the eggs and mix in the buttermilk until well combined.
- Heat about 2 inches of vegetable oil in a deep skillet or heavy-bottomed pot over medium-high heat until it reaches 350°F (use a thermometer for best results). Mama Lou always warned me to be patient here—hot oil is the key to crispiness without greasiness.
- Dip each piece of chicken or mushroom into the wet mixture, then dredge thoroughly in the seasoned flour mixture. For the crispiest bite, repeat the wet and dry dip once more. This double coating was a trick Ouma discovered when she wanted an extra crunchy snack during movie nights.
- Carefully place the coated pieces into the hot oil, frying in small batches to avoid overcrowding. Cook for about 4-5 minutes, turning occasionally until golden brown and cooked through. Mushrooms will take slightly less time, about 3-4 minutes. Keep an eye on them—you want that perfect golden crunch.
- Remove the bites from oil with a slotted spoon and place them on a paper towel-lined plate to drain excess oil. Mama Lou would always say, “Pat ‘em dry, or the crunch won’t last.”
- Sprinkle with a little extra salt and fresh parsley before serving to add brightness and that homemade touch.
Tips for Making the Best Trailer Park Toad Bites
- Use fresh buttermilk or the milk-and-lemon juice substitute to tenderize the chicken and add tang. I remember Mama Lou insisting on buttermilk—it’s a game-changer!
- Don’t rush the oil temperature. If it’s too low, the bites soak up oil and get soggy. Too hot, and the outside burns before the inside cooks. A candy or deep-fry thermometer is worth every penny.
- Double-dip your pieces in the wet and dry mixtures for a thicker, crunchier coating. Ouma and I always argued over who got the crunchier one!
- For a vegetarian twist, mushrooms or cauliflower florets work beautifully and soak up the flavors just as well.
- Serve immediately for the crispiest texture, but if you must wait, keep them warm in a low oven (around 200°F) on a wire rack to prevent sogginess.
Serving Suggestions and Pairings

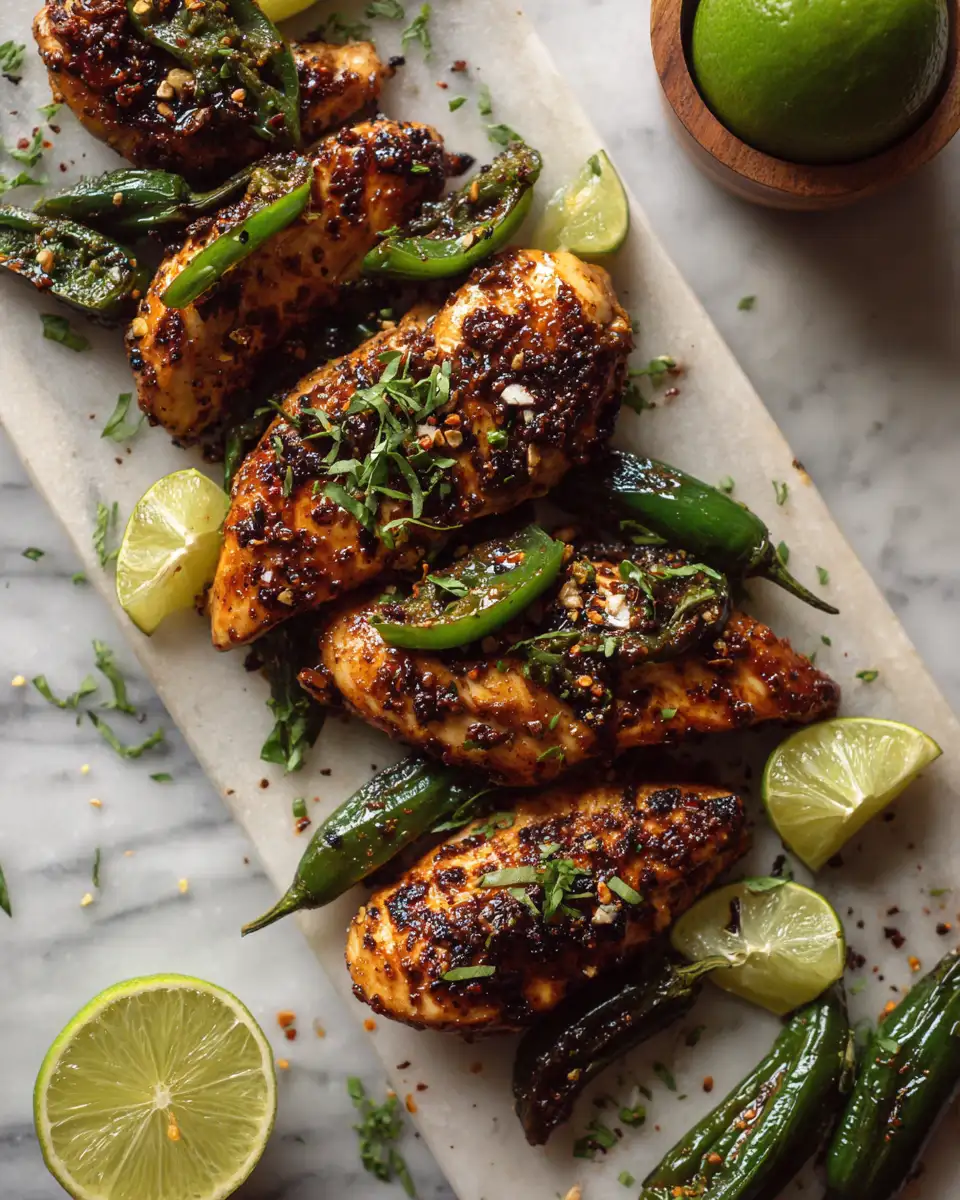
These Trailer Park Toad Bites are incredibly versatile. I love serving them alongside a cool, creamy ranch dip or a tangy barbecue sauce—Mama Lou’s secret homemade barbecue sauce is still a family favorite that never fails to impress. For a heartier meal, pair them with a crisp coleslaw or a fresh garden salad tossed in a light vinaigrette. When Ouma and I were kids, we’d pile these bites on paper plates at family picnics, with a big jug of sweet tea nearby—there’s just something about that combo that feels like pure joy.
If you’re feeling adventurous, try them with a spicy honey mustard glaze or alongside pickled jalapeños for an extra kick. The bites also make a fantastic snack for game day or casual get-togethers, where everyone can grab and snack without fuss. Learn more: Discover the Irresistible Flavors of Boston Baked Cod
Storage and Reheating Tips
Leftover Trailer Park Toad Bites can be stored in an airtight container in the refrigerator for up to 3 days. To keep them from losing their crispiness, spread them out on a baking sheet and reheat in a preheated oven at 375°F for about 10-12 minutes. Avoid the microwave if you can—it tends to make them soggy, and nobody wants that.
For longer storage, you can freeze the cooked bites after they’ve cooled completely. Place them in a single layer on a baking sheet to freeze, then transfer to a freezer-safe bag. Reheat straight from frozen in the oven for best results. I’ve done this many times during busy weeks when I crave a taste of Mama Lou’s kitchen but don’t have hours to cook.
Frequently Asked Questions
What are the main ingredients for Trailer Park Toad Bites?
The main ingredients for Trailer Park Toad Bites include the items listed in our ingredients section above. Each ingredient plays a crucial role in achieving the perfect flavor and texture.
How long does it take to make Trailer Park Toad Bites?
The total time to make Trailer Park Toad Bites includes both preparation and cooking time. Check the recipe card above for exact timing details.
Can I make Trailer Park Toad Bites ahead of time?
Yes, Trailer Park Toad Bites can often be prepared in advance. Store it properly in an airtight container in the refrigerator and consume within the recommended timeframe.
What can I serve with Trailer Park Toad Bites?
Trailer Park Toad Bites pairs well with various sides and accompaniments. Consider the serving suggestions mentioned in the recipe for the best dining experience.
Is Trailer Park Toad Bites suitable for special diets?
Depending on the ingredients used, Trailer Park Toad Bites may be adapted for various dietary needs. Check the ingredients list and consider substitutions as needed for your dietary requirements.
Final Thoughts
Trailer Park Toad Bites aren’t just a recipe to me—they’re a delicious thread woven through my family’s story. Every time I make them, I’m transported back to those sun-drenched afternoons with Mama Lou and Ouma, when the world felt simple and full of possibility. They’re a reminder that food isn’t only about sustenance but about connection, laughter, and love shared around the table.
“Good food, like these bites, carries the soul of the kitchen and the heart of the family.”
I hope these bites bring you the same joy and warmth they’ve brought me. Whether you’re cooking for family, friends, or just yourself, remember that the best recipes come from the heart—and a little bit of crunchy magic never hurts. So go ahead, make those Trailer Park Toad Bites, and create your own memories with every bite.