
There’s something incredibly comforting about banana pudding—it’s the taste of childhood summers, of Mama Lou’s kitchen filled with the scent of vanilla and ripe bananas, and the sound of my sister Ouma giggling as she snuck a spoonful before dinner. Today, I’m excited to share a special treat that captures all those memories in one luscious bite: my RECIPE for Banana Pudding Cheesecake Bars Download. These bars are the perfect blend of creamy cheesecake and classic banana pudding, wrapped in a buttery crust that feels like a warm hug from family. I hope this recipe brings you as much joy and nostalgia as it has brought me over the years.
Why You’ll Love This RECIPE for Banana Pudding Cheesecake Bars Download
When I first combined banana pudding and cheesecake, I was a little nervous. Would the flavors clash? Would the texture be too heavy? But as I stood in Mama Lou’s kitchen, stirring the creamy mixture and watching the golden crust form in the oven, I knew I was onto something special. This recipe brings together the best parts of both desserts—the silky richness of cheesecake with the sweet, comforting notes of banana pudding. It’s perfect for any occasion, whether you’re sharing with family after Sunday dinner or surprising friends at a potluck.
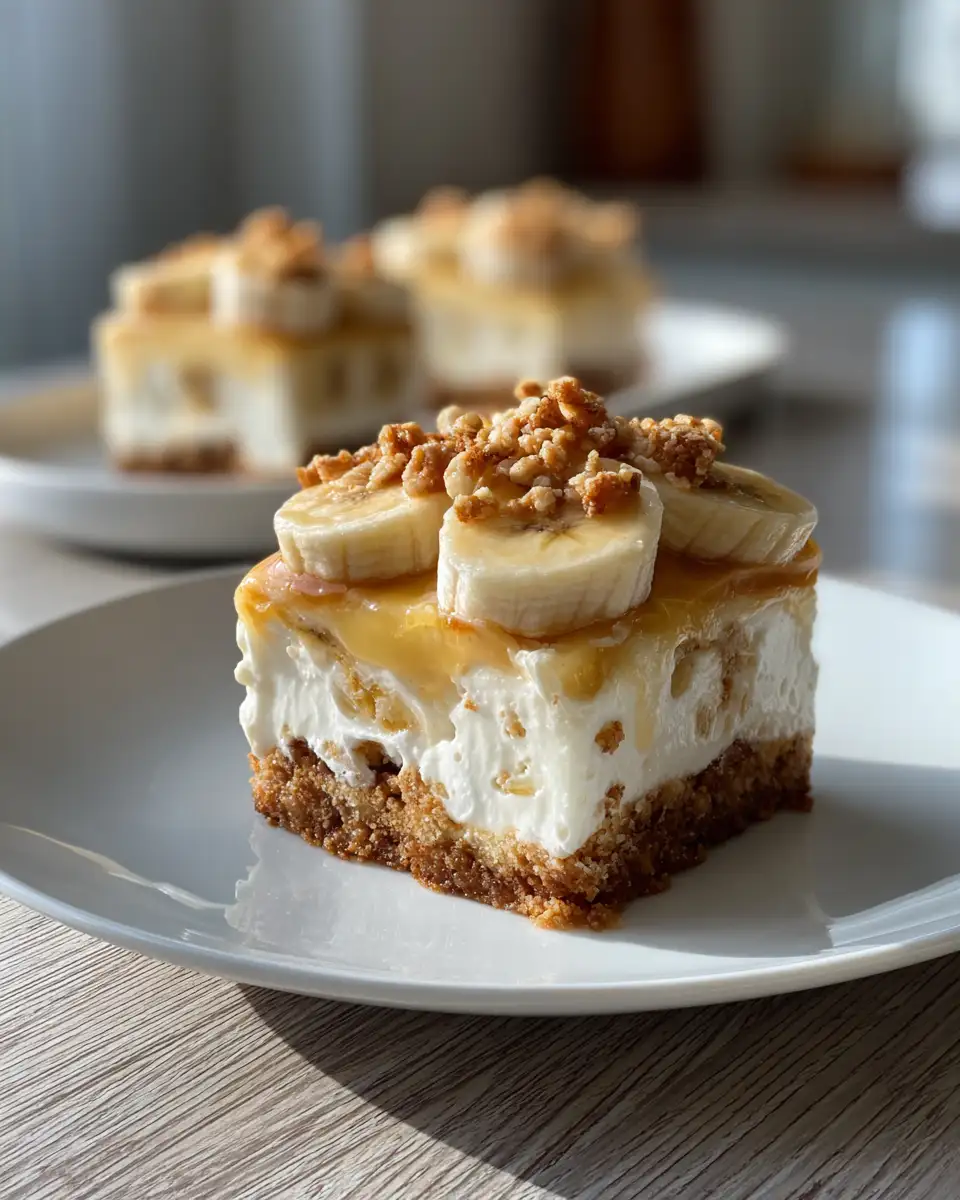
What makes these bars stand out is their layered texture. The crust is buttery and crisp, the banana pudding adds a tender softness, and the cheesecake topping melts in your mouth. Plus, it’s easy to make ahead and share. Whenever I make these, I’m reminded of how Mama Lou would layer flavors and textures in her cooking, always with care and love. This recipe is a tribute to her legacy and a way to keep those memories alive.
Ingredients You’ll Need for This RECIPE for Banana Pudding Cheesecake Bars Download

- 1 1/2 cups graham cracker crumbs (you can substitute with digestive biscuits)
- 1/2 cup unsalted butter, melted
- 1/4 cup granulated sugar
- 3 ripe bananas, sliced
- 1 (3.4 oz) box instant vanilla pudding mix
- 2 cups cold whole milk
- 16 oz cream cheese, softened
- 3/4 cup granulated sugar
- 2 large eggs
- 1 teaspoon vanilla extract
- 1 cup sour cream (can substitute with Greek yogurt for a tangier bite)
- Optional: whipped cream or vanilla wafer crumbs for topping
When I taught Ouma how to bake these bars, we experimented a bit with substitutions. Using Greek yogurt instead of sour cream gave the bars a lovely tang that balanced the sweetness perfectly. And if you’re like me and prefer a little crunch, sprinkling vanilla wafer crumbs on top before baking adds a nostalgic touch that Mama Lou would have loved.
Nutrition Facts
- Calories: Approximately 350 per serving (based on 12 bars)
- Protein: 6g
- Fat: 20g
- Carbohydrates: 35g
- Fiber: 1g
- Sugar: 22g
- Sodium: 180mg
While these bars are a delicious indulgence, they also provide some protein from the cream cheese and eggs, along with potassium from the bananas. I always remind family and friends to savor these treats as part of a balanced approach to eating—just like Mama Lou did, enjoying sweets with the same gratitude as a fresh garden tomato in summer.
Print
Irresistible Recipe for Banana Pudding Cheesecake Bars Download and Delight
Learn how to make delicious RECIPE for Banana Pudding Cheesecake Bars Download. Easy recipe with step-by-step instructions.
- Total Time: 45 minutes
- Yield: 4 servings 1x
Ingredients
- 1 1/2 cups graham cracker crumbs (you can substitute with digestive biscuits)
- 1/2 cup unsalted butter, melted
- 1/4 cup granulated sugar
- 3 ripe bananas, sliced
- 1 (3.4 oz) box instant vanilla pudding mix
- 2 cups cold whole milk
- 16 oz cream cheese, softened
- 3/4 cup granulated sugar
- 2 large eggs
- 1 teaspoon vanilla extract
- 1 cup sour cream (can substitute with Greek yogurt for a tangier bite)
- Optional: whipped cream or vanilla wafer crumbs for topping
When I taught Ouma how to bake these bars, we experimented a bit with substitutions. Using Greek yogurt instead of sour cream gave the bars a lovely tang that balanced the sweetness perfectly. And if you’re like me and prefer a little crunch, sprinkling vanilla wafer crumbs on top before baking adds a nostalgic touch that Mama Lou would have loved.
Instructions
- Preheat your oven to 325°F (160°C). Line a 9×13-inch baking pan with parchment paper, leaving a little overhang on the sides for easy removal.
- In a medium bowl, combine graham cracker crumbs, melted butter, and 1/4 cup sugar. Stir until the mixture resembles wet sand.
- Press the crumb mixture firmly into the bottom of the prepared pan, creating an even layer. Bake for 10 minutes until golden and fragrant. Remove from oven and set aside to cool slightly.
- In a separate bowl, whisk together instant vanilla pudding mix and cold milk until thickened, about 2 minutes. Let it rest while you prepare the cheesecake layer.
- In a large bowl, beat the softened cream cheese with 3/4 cup sugar until smooth and creamy. Add eggs one at a time, beating well after each addition.
- Mix in vanilla extract and sour cream (or Greek yogurt), beating until fully incorporated and smooth.
- Spread a thin layer of the cheesecake mixture over the cooled crust. Then, arrange banana slices evenly on top of this layer.
- Pour the prepared pudding over the bananas, smoothing it out gently.
- Finally, spread the remaining cheesecake mixture over the pudding layer evenly. If you like, sprinkle vanilla wafer crumbs on top for extra texture.
- Bake the bars for 45-50 minutes, or until the edges are set but the center still jiggles slightly when you gently shake the pan.
- Remove from oven and let cool to room temperature, then refrigerate for at least 4 hours or overnight to fully set.
- Use the parchment paper overhang to lift the bars from the pan. Slice into 12 squares and serve cold.
When I first made these with Ouma, she was amazed at how the layers stayed so distinct yet melded beautifully in flavor. My tip? Don’t rush the chilling step—it’s essential for those perfect, creamy bars that hold together with just the right balance of softness and structure.
- Prep Time: 15 minutes
- Cook Time: 30 minutes
- Category: Main Dish
- Method: Cooking
- Cuisine: International
Steps to Create Your RECIPE for Banana Pudding Cheesecake Bars Download
- Preheat your oven to 325°F (160°C). Line a 9×13-inch baking pan with parchment paper, leaving a little overhang on the sides for easy removal.
- In a medium bowl, combine graham cracker crumbs, melted butter, and 1/4 cup sugar. Stir until the mixture resembles wet sand.
- Press the crumb mixture firmly into the bottom of the prepared pan, creating an even layer. Bake for 10 minutes until golden and fragrant. Remove from oven and set aside to cool slightly.
- In a separate bowl, whisk together instant vanilla pudding mix and cold milk until thickened, about 2 minutes. Let it rest while you prepare the cheesecake layer.
- In a large bowl, beat the softened cream cheese with 3/4 cup sugar until smooth and creamy. Add eggs one at a time, beating well after each addition.
- Mix in vanilla extract and sour cream (or Greek yogurt), beating until fully incorporated and smooth.
- Spread a thin layer of the cheesecake mixture over the cooled crust. Then, arrange banana slices evenly on top of this layer.
- Pour the prepared pudding over the bananas, smoothing it out gently.
- Finally, spread the remaining cheesecake mixture over the pudding layer evenly. If you like, sprinkle vanilla wafer crumbs on top for extra texture.
- Bake the bars for 45-50 minutes, or until the edges are set but the center still jiggles slightly when you gently shake the pan.
- Remove from oven and let cool to room temperature, then refrigerate for at least 4 hours or overnight to fully set.
- Use the parchment paper overhang to lift the bars from the pan. Slice into 12 squares and serve cold.
When I first made these with Ouma, she was amazed at how the layers stayed so distinct yet melded beautifully in flavor. My tip? Don’t rush the chilling step—it’s essential for those perfect, creamy bars that hold together with just the right balance of softness and structure.
Tips for Making the Best RECIPE for Banana Pudding Cheesecake Bars Download
Over the years, I’ve learned a few secrets that make these bars truly shine. For one, always use ripe bananas—they bring natural sweetness and moisture that elevate the pudding layer. I remember Mama Lou insisting on bananas with just a few brown spots; anything less just wasn’t right. Learn more: Irresistible Rolo Cheesecake Bars You Need to Try Today
Another tip is to soften your cream cheese well before mixing. I usually leave it out at room temperature for an hour or give it a quick zap in the microwave (10 seconds at a time) to avoid lumps. This little step makes the cheesecake layer silky smooth, just like the one Mama Lou used to make for family gatherings.
Also, don’t skip the parchment paper lining—it makes removing the bars so much easier and keeps them intact when slicing. And if you’re feeling adventurous, sprinkle a pinch of cinnamon or nutmeg into the pudding mix for a warm twist that Ouma and I love during cooler months.
Serving Suggestions and Pairings

These bars are a showstopper on their own, but pairing them with the right accompaniments can turn a simple dessert into a celebration. I often serve them with a dollop of freshly whipped cream, lightly sweetened with a touch of vanilla. For a bit of contrast, drizzle a little caramel sauce or sprinkle toasted pecans on top.
On a warm summer afternoon, Ouma and I enjoy these bars with a tall glass of cold milk or iced coffee. For holiday dinners, I like to present them alongside fresh berries or a scoop of vanilla bean ice cream. The combination of creamy, fruity, and crunchy textures always sparks smiles and conversations—just like those afternoons in Mama Lou’s kitchen.
Storage and Reheating Tips
These banana pudding cheesecake bars keep beautifully in the refrigerator for up to 4 days. Store them in an airtight container to maintain their moisture and flavor. I usually slice them before storing, so they’re ready to grab and go for a quick snack or dessert.
If you want to freeze the bars, wrap them tightly in plastic wrap and then foil to prevent freezer burn. They’ll keep for up to 2 months this way. When you’re ready to enjoy, thaw overnight in the fridge. Avoid microwaving—they’re best served cold to preserve the creamy texture and prevent the pudding layer from becoming watery.
Frequently Asked Questions
What are the main ingredients for RECIPE for Banana Pudding Cheesecake Bars Download?
The main ingredients for RECIPE for Banana Pudding Cheesecake Bars Download include the items listed in our ingredients section above. Each ingredient plays a crucial role in achieving the perfect flavor and texture.
How long does it take to make RECIPE for Banana Pudding Cheesecake Bars Download?
The total time to make RECIPE for Banana Pudding Cheesecake Bars Download includes both preparation and cooking time. Check the recipe card above for exact timing details.
Can I make RECIPE for Banana Pudding Cheesecake Bars Download ahead of time?
Yes, RECIPE for Banana Pudding Cheesecake Bars Download can often be prepared in advance. Store it properly in an airtight container in the refrigerator and consume within the recommended timeframe.
What can I serve with RECIPE for Banana Pudding Cheesecake Bars Download?
RECIPE for Banana Pudding Cheesecake Bars Download pairs well with various sides and accompaniments. Consider the serving suggestions mentioned in the recipe for the best dining experience.
Is RECIPE for Banana Pudding Cheesecake Bars Download suitable for special diets?
Depending on the ingredients used, RECIPE for Banana Pudding Cheesecake Bars Download may be adapted for various dietary needs. Check the ingredients list and consider substitutions as needed for your dietary requirements.
Final Thoughts
Sharing this RECIPE for Banana Pudding Cheesecake Bars Download feels like passing down a piece of my family’s heart. Each bite carries the warmth of Mama Lou’s kitchen, the laughter of afternoons spent baking with Ouma, and the simple joy that comes from creating something with love. I hope these bars become a part of your family traditions too—whether it’s a special occasion or just a sweet moment to savor during the week.
“Food is more than sustenance; it is memory, connection, and love folded into every bite.” – Chef Sofia
So, gather your ingredients, take a deep breath, and dive into this recipe. I promise, you’ll taste the love in every creamy layer and buttery crumb. Happy baking!