
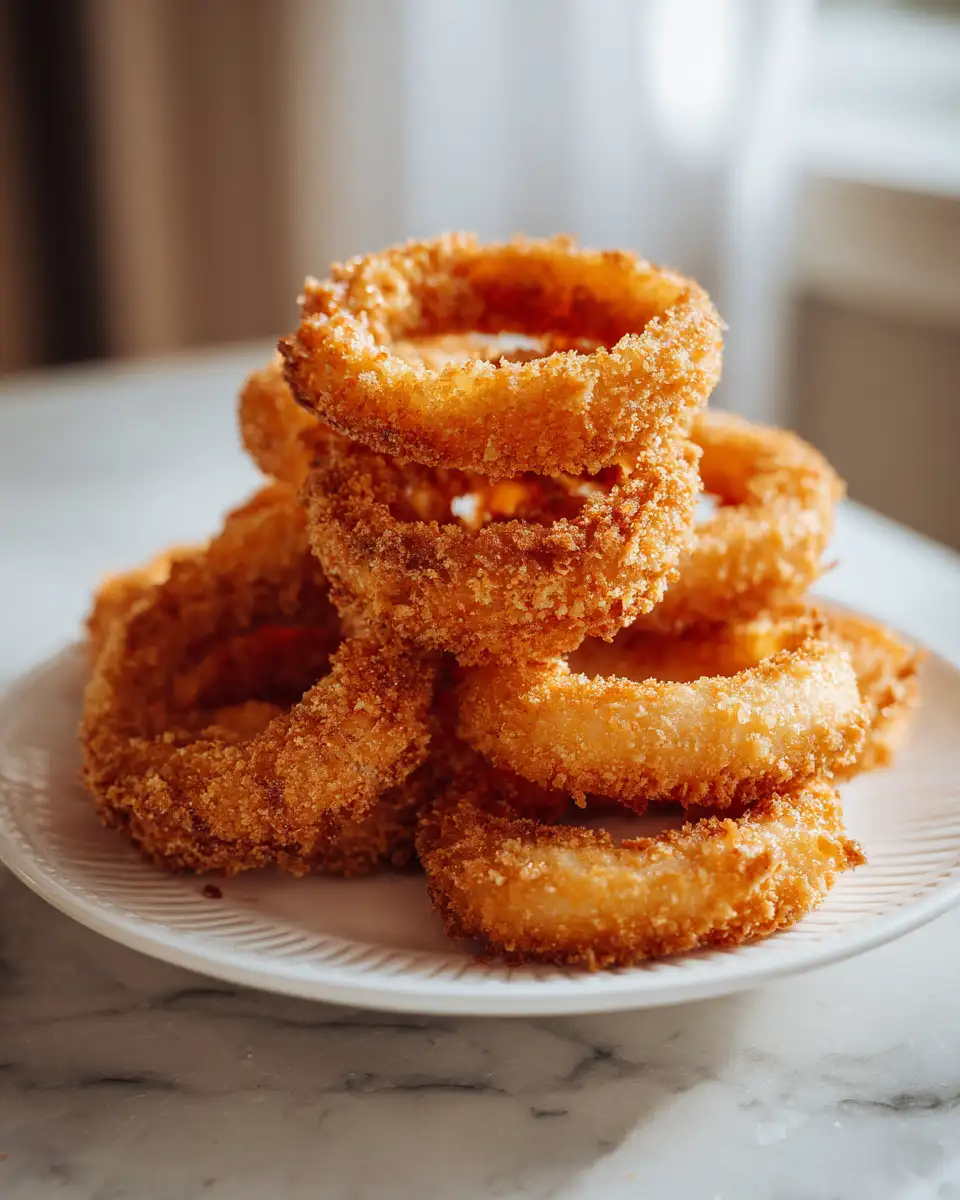
There’s something deeply comforting about CRISPY HOMEMADE ONION RINGS that takes me right back to my childhood kitchen, where Mama Lou’s laughter filled the air and the scent of sizzling onions brought our family together. I remember sitting on the worn kitchen stool, watching her expertly dip each onion slice into a secret batter, whispering little tips to me and my sister Ouma as we eagerly waited for the golden rings to come out of the hot oil. This recipe isn’t just about crunchy, flavorful onion rings; it’s a celebration of those warm, shared moments that remind me why the simplest dishes often carry the most love.
Table of Contents
Why You’ll Love This CRISPY HOMEMADE ONION RINGS
What makes these CRISPY HOMEMADE ONION RINGS so special isn’t just the perfect crunch or the sweet tender onion inside—it’s the memories and traditions wrapped up in every bite. Growing up, onion rings were more than an appetizer; they were a family ritual. Mama Lou believed that the secret to great onion rings wasn’t just in the ingredients, but in the care and patience put into making them. She always said, “It’s the love you fry in that makes them unforgettable.”
These onion rings achieve that perfect balance of crispy exterior and juicy, flavorful onion, thanks to a batter that’s light yet holds on tight through frying. Whether you’re serving them up for a casual weeknight snack with Ouma or impressing guests at a weekend get-together, they’re guaranteed to bring smiles and a little nostalgia to the table. Plus, making them at home means you skip the preservatives and get to control the seasoning to suit your family’s taste—something Mama Lou always insisted on.
Ingredients You’ll Need for This CRISPY HOMEMADE ONION RINGS
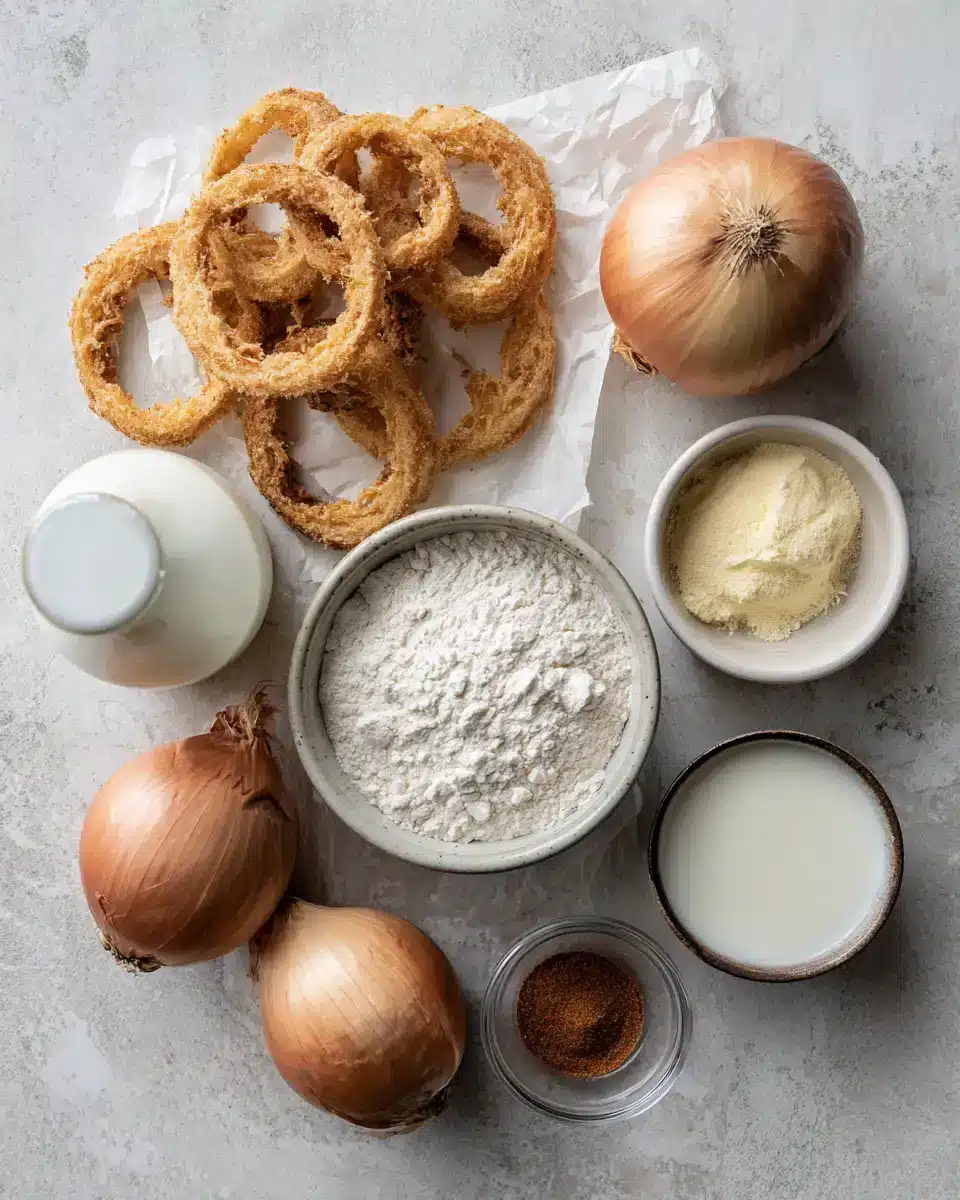
- 2 large sweet onions (Vidalia or Walla Walla work beautifully)
- 1 ½ cups all-purpose flour, plus extra for dusting
- 1 teaspoon baking powder
- 1 teaspoon smoked paprika (adds a subtle warmth)
- 1 teaspoon garlic powder
- 1 teaspoon salt, divided
- ½ teaspoon black pepper
- 1 large egg
- 1 cup buttermilk (or 1 cup milk with 1 tablespoon lemon juice, let sit 5 minutes as a substitute)
- 1 ½ cups panko breadcrumbs (for extra crunch) or regular breadcrumbs
- Vegetable oil or peanut oil, for frying (enough for a deep fryer or heavy-bottomed pot)
If you’re looking to make these gluten-free, you can swap the all-purpose flour and breadcrumbs for a gluten-free blend and gluten-free panko. For a dairy-free option, almond milk or oat milk with lemon juice works well in place of buttermilk. I remember Mama Lou once adapted her recipes on the fly when Ouma developed a mild dairy sensitivity—her kitchen was always about adaptability and love.
Nutrition Facts
- Calories: Approximately 280 per serving (about 6 onion rings)
- Protein: 5 grams
- Fat: 15 grams (mostly from frying oil)
- Carbohydrates: 30 grams
- Fiber: 2 grams
- Sugar: 5 grams (naturally occurring from onions)
- Sodium: 400 mg
While these onion rings are a treat, I always remind myself and my readers that they’re best enjoyed in moderation, just like Mama Lou taught us—food is about joy and connection, not guilt. Pairing them with a fresh salad or some grilled veggies can balance out the meal beautifully.
Print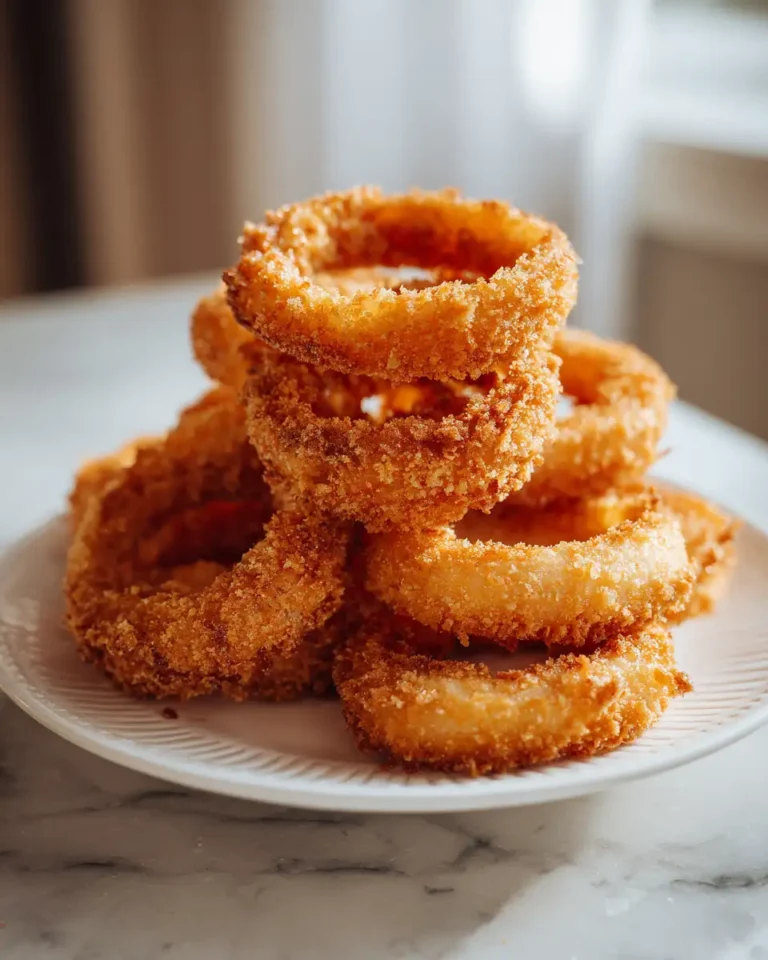
The Ultimate Guide to Crispy Homemade Onion Rings That Crunch Perfectly Every Time
Learn how to make delicious CRISPY HOMEMADE ONION RINGS. Easy recipe with step-by-step instructions.
- Total Time: 45 minutes
- Yield: 4 servings 1x
Ingredients
- 2 large sweet onions (Vidalia or Walla Walla work beautifully)
- 1 ½ cups all-purpose flour, plus extra for dusting
- 1 teaspoon baking powder
- 1 teaspoon smoked paprika (adds a subtle warmth)
- 1 teaspoon garlic powder
- 1 teaspoon salt, divided
- ½ teaspoon black pepper
- 1 large egg
- 1 cup buttermilk (or 1 cup milk with 1 tablespoon lemon juice, let sit 5 minutes as a substitute)
- 1 ½ cups panko breadcrumbs (for extra crunch) or regular breadcrumbs
- Vegetable oil or peanut oil, for frying (enough for a deep fryer or heavy-bottomed pot)
If you’re looking to make these gluten-free, you can swap the all-purpose flour and breadcrumbs for a gluten-free blend and gluten-free panko. For a dairy-free option, almond milk or oat milk with lemon juice works well in place of buttermilk. I remember Mama Lou once adapted her recipes on the fly when Ouma developed a mild dairy sensitivity—her kitchen was always about adaptability and love.
Instructions
- Peel the onions and slice them into ½-inch thick rings. Gently separate the rings and set aside.
- In a medium bowl, whisk together the flour, baking powder, smoked paprika, garlic powder, half of the salt, and black pepper.
- In another bowl, whisk the egg and buttermilk until combined.
- Pour the wet ingredients into the dry ingredients and stir gently until just combined. The batter will be thick but smooth—if it seems too thick, add a splash more buttermilk.
- Pour the panko breadcrumbs onto a large plate. Lightly dust each onion ring with flour, then dip it into the batter, allowing excess to drip off, and press it gently into the breadcrumbs to coat well.
- Heat oil in a deep fryer or heavy-bottomed pot to 350°F (175°C). To test if the oil is ready, drop a small bit of batter into the oil—if it sizzles and rises to the surface quickly, you’re set.
- Carefully place a few onion rings into the hot oil, frying in batches to avoid overcrowding. Fry each batch for about 2-3 minutes, turning once, until golden brown and crispy.
- Use a slotted spoon to transfer onion rings to a paper towel-lined plate to drain excess oil. Immediately sprinkle with the remaining salt while still hot.
- Repeat the frying process with remaining onion rings.
- Serve warm, and enjoy! Mama Lou always said to eat them fresh, but if you need to wait, keep them warm in a low oven (200°F) while finishing the batch.
One of my favorite memories is how Mama Lou would sneak a few onion rings before anyone else got to the plate, winking at Ouma and me like we were in on a delicious secret. That’s the kind of indulgence this recipe invites—simple, joyful, and shared.
- Prep Time: 15 minutes
- Cook Time: 30 minutes
- Category: Main Dish
- Method: Cooking
- Cuisine: International
Steps to Create Your CRISPY HOMEMADE ONION RINGS
- Peel the onions and slice them into ½-inch thick rings. Gently separate the rings and set aside.
- In a medium bowl, whisk together the flour, baking powder, smoked paprika, garlic powder, half of the salt, and black pepper.
- In another bowl, whisk the egg and buttermilk until combined.
- Pour the wet ingredients into the dry ingredients and stir gently until just combined. The batter will be thick but smooth—if it seems too thick, add a splash more buttermilk.
- Pour the panko breadcrumbs onto a large plate. Lightly dust each onion ring with flour, then dip it into the batter, allowing excess to drip off, and press it gently into the breadcrumbs to coat well.
- Heat oil in a deep fryer or heavy-bottomed pot to 350°F (175°C). To test if the oil is ready, drop a small bit of batter into the oil—if it sizzles and rises to the surface quickly, you’re set.
- Carefully place a few onion rings into the hot oil, frying in batches to avoid overcrowding. Fry each batch for about 2-3 minutes, turning once, until golden brown and crispy.
- Use a slotted spoon to transfer onion rings to a paper towel-lined plate to drain excess oil. Immediately sprinkle with the remaining salt while still hot.
- Repeat the frying process with remaining onion rings.
- Serve warm, and enjoy! Mama Lou always said to eat them fresh, but if you need to wait, keep them warm in a low oven (200°F) while finishing the batch.
One of my favorite memories is how Mama Lou would sneak a few onion rings before anyone else got to the plate, winking at Ouma and me like we were in on a delicious secret. That’s the kind of indulgence this recipe invites—simple, joyful, and shared. Learn more: The Ultimate Guide to Crispy Cauliflower That Will Crunch Your Cravings
Tips for Making the Best CRISPY HOMEMADE ONION RINGS
- Choose the right onion: Sweet onions have a milder flavor and caramelize beautifully when fried. I always pick Vidalias from the farmers’ market, just like Mama Lou did.
- Keep your oil temperature steady: Too hot and the rings burn outside but stay raw inside; too cool and they become greasy. Use a thermometer to maintain 350°F.
- Double coating works wonders: Dusting with flour before dipping in batter helps the batter adhere better, which Mama Lou swore by.
- Don’t overcrowd the fryer: Fry in small batches to keep the oil temperature consistent and the rings crispy.
- Try panko breadcrumbs: For that extra crunch, I love using panko. It reminds me of the texture Mama Lou achieved with her homemade breadcrumbs, a skill Ouma and I are still perfecting.
- Season immediately: Salt the rings right after frying while they’re still hot so the seasoning sticks beautifully.
Serving Suggestions and Pairings
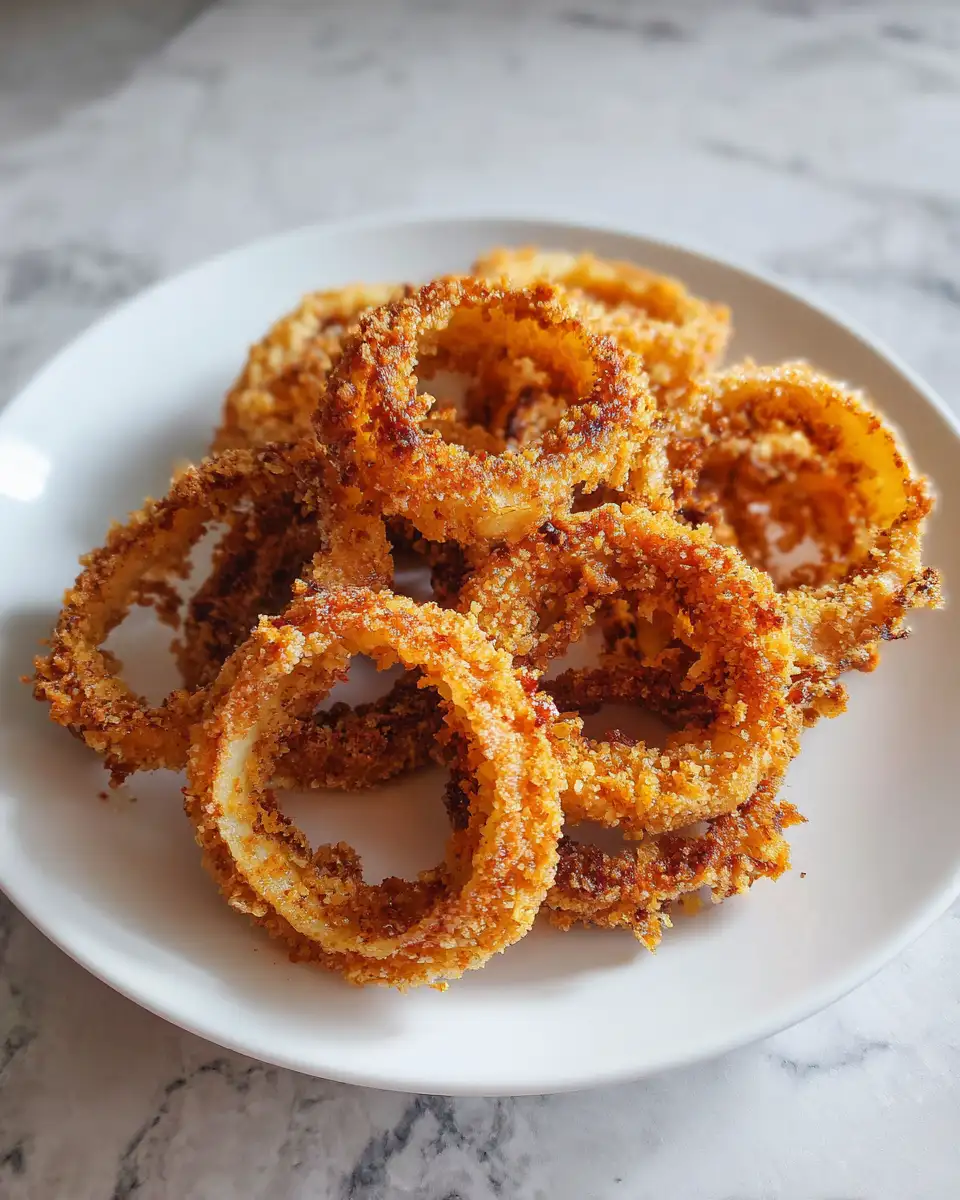
When I serve these CRISPY HOMEMADE ONION RINGS, I like to keep the accompaniments simple but full of flavor. Mama Lou always paired them with her homemade spicy aioli—garlic, lemon, and a touch of smoked paprika mixed into mayonnaise. Ouma and I often remade this sauce together, each of us adding a little extra kick to suit our tastes.
Here are some pairings that bring out the best in onion rings:
- A cool, creamy dip like ranch or blue cheese
- Classic ketchup with a twist—add a dash of hot sauce or smoked paprika
- Grilled burgers or sandwiches for a hearty meal
- A crisp green salad with a tangy vinaigrette to balance the richness
- Cold beer or a sparkling lemonade for refreshing contrast
One sunny afternoon, Ouma and I recreated this spread for a backyard picnic, and watching our kids enjoy the onion rings just as we had with Mama Lou made my heart so full. Food truly connects generations.
Storage and Reheating Tips
While these onion rings are best enjoyed fresh, I understand life gets busy, and sometimes you want to save leftovers. Here’s how I keep them tasting great:
- Store cooled onion rings in an airtight container lined with paper towels to absorb moisture.
- Keep them in the refrigerator for up to 2 days. Beyond that, they start to lose their crispness.
- To reheat, preheat your oven to 375°F (190°C). Arrange onion rings on a baking sheet and bake for 8-10 minutes, flipping halfway through. This helps restore their crunch without making them soggy.
- Air fryers also work wonderfully for reheating—3-5 minutes at 350°F (175°C) does the trick.
One time, after a big family gathering, I saved the leftover onion rings and was worried they’d go to waste. But reheating them properly brought back that crispy magic, and the kids were none the wiser. Mama Lou would have approved!
Frequently Asked Questions
What are the main ingredients for CRISPY HOMEMADE ONION RINGS?
The main ingredients for CRISPY HOMEMADE ONION RINGS include the items listed in our ingredients section above. Each ingredient plays a crucial role in achieving the perfect flavor and texture.
How long does it take to make CRISPY HOMEMADE ONION RINGS?
The total time to make CRISPY HOMEMADE ONION RINGS includes both preparation and cooking time. Check the recipe card above for exact timing details.
Can I make CRISPY HOMEMADE ONION RINGS ahead of time?
Yes, CRISPY HOMEMADE ONION RINGS can often be prepared in advance. Store it properly in an airtight container in the refrigerator and consume within the recommended timeframe.
What can I serve with CRISPY HOMEMADE ONION RINGS?
CRISPY HOMEMADE ONION RINGS pairs well with various sides and accompaniments. Consider the serving suggestions mentioned in the recipe for the best dining experience.
Is CRISPY HOMEMADE ONION RINGS suitable for special diets?
Depending on the ingredients used, CRISPY HOMEMADE ONION RINGS may be adapted for various dietary needs. Check the ingredients list and consider substitutions as needed for your dietary requirements.
Final Thoughts
Making CRISPY HOMEMADE ONION RINGS isn’t just about the food—it’s about creating moments, sharing stories, and carrying forward the warmth of family traditions. Every time I fry up a batch, I think of Mama Lou’s kitchen, where the world slowed down just enough for us to savor simple pleasures. These onion rings hold that spirit in every crunch, inviting you to gather loved ones, whisper secrets, and make memories of your own.
Whether you’re a seasoned cook or just starting out, this recipe offers a delicious way to connect with those you care about. So grab those onions, warm up the oil, and enjoy the crispy, golden magic that only homemade onion rings can bring. As Mama Lou said, “Good food is like a good hug—it stays with you long after the meal is over.”