

There’s something magical about gathering around an open fire with family, the air filled with laughter and the smell of something delicious cooking. Pie Iron Pizza Pockets have become one of my favorite ways to bring that magic to life, a recipe that’s as much about the experience as the food. I still remember the first time Mama Lou handed me a pie iron, her hands steady and warm, showing me how to fold dough around my favorite pizza fillings. My sister Ouma was beside me, both of us eager to create our own little pockets of comfort. These Pizza Pockets aren’t just a treat; they’re a bridge to those memories, perfect for family gatherings, camping trips, or simply a cozy night in.
Why You’ll Love This Pie Iron Pizza Pockets
Pie Iron Pizza Pockets bring together everything I cherish about cooking with family: simplicity, creativity, and heartwarming flavors. The beauty of this recipe lies in its versatility and the joy of cooking outdoors or indoors. You get a crispy, golden crust encasing melty cheese, savory tomato sauce, and your favorite toppings, all sealed in a handheld pocket. It’s like a personal pizza hug straight from the fire. When I taught Ouma how to make these, I saw her eyes light up as she customized her pockets with veggies and pepperoni, reminding me how food connects us across generations and moments.
This recipe is also a fantastic way to get everyone involved. From choosing toppings to assembling the pockets, it turns meal prep into a fun, shared experience. Plus, it’s forgiving—whether you’re using fresh dough or store-bought, classic pizza sauce or a homemade blend, it all works beautifully. And for those who love camping as much as I do, these pockets come together quickly and cook perfectly over coals or a grill, making them the ultimate outdoor meal.
Ingredients You’ll Need for This Pie Iron Pizza Pockets
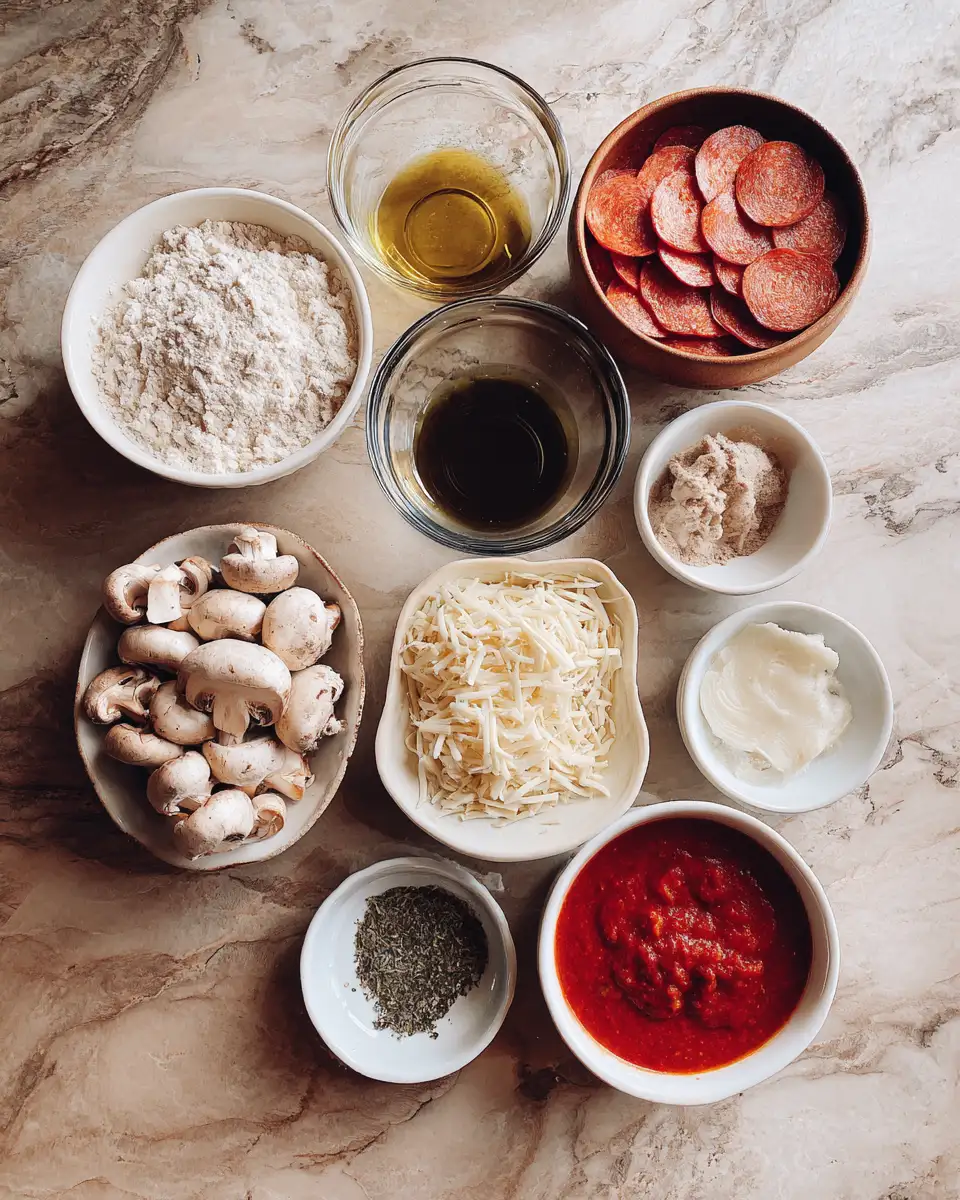
- 2 cups all-purpose flour (or whole wheat flour for a nuttier flavor)
- 1 teaspoon active dry yeast
- 1 teaspoon sugar
- 3/4 cup warm water (about 110°F)
- 1 tablespoon olive oil, plus extra for brushing
- 1/2 teaspoon salt
- 1 cup pizza sauce (store-bought or homemade; Mama Lou’s tomato basil sauce is my favorite)
- 1 1/2 cups shredded mozzarella cheese
- 1/2 cup sliced pepperoni or cooked sausage (optional)
- 1/2 cup sliced mushrooms, bell peppers, or spinach (optional veggies)
- Cooking spray or butter, for greasing the pie iron
If you’re short on time or prefer a shortcut, store-bought pizza dough works beautifully here. For a dairy-free option, swap mozzarella for a plant-based cheese or omit it entirely, adding extra veggies or seasoned tofu instead. The key is to keep the fillings balanced so the dough seals well and cooks evenly.
Nutrition Facts
- Calories: Approximately 350 per serving (1 pizza pocket)
- Protein: 15g
- Fat: 12g (mostly from cheese and olive oil)
- Carbohydrates: 38g
- Fiber: 3g
- Sugar: 5g
- Sodium: 600mg (varies depending on cheese and sauce)
These values are based on typical ingredients and can shift depending on your choices, like opting for low-sodium sauces or leaner meats. When I make these with Ouma, we often add extra veggies, which bumps up the fiber and adds fresh flavor without extra calories. Learn more: The Ultimate Guide to Crispy Homemade Onion Rings That Crunch Perfectly Every Time
Print
Ultimate Guide to Delicious Pie Iron Pizza Pockets for Campfire Cooking
Learn how to make delicious Pie Iron Pizza Pockets. Easy recipe with step-by-step instructions.
- Total Time: 45 minutes
- Yield: 4 servings 1x
Ingredients
- 2 cups all-purpose flour (or whole wheat flour for a nuttier flavor)
- 1 teaspoon active dry yeast
- 1 teaspoon sugar
- 3/4 cup warm water (about 110°F)
- 1 tablespoon olive oil, plus extra for brushing
- 1/2 teaspoon salt
- 1 cup pizza sauce (store-bought or homemade; Mama Lou’s tomato basil sauce is my favorite)
- 1 1/2 cups shredded mozzarella cheese
- 1/2 cup sliced pepperoni or cooked sausage (optional)
- 1/2 cup sliced mushrooms, bell peppers, or spinach (optional veggies)
- Cooking spray or butter, for greasing the pie iron
If you’re short on time or prefer a shortcut, store-bought pizza dough works beautifully here. For a dairy-free option, swap mozzarella for a plant-based cheese or omit it entirely, adding extra veggies or seasoned tofu instead. The key is to keep the fillings balanced so the dough seals well and cooks evenly.
Instructions
- Start by activating your yeast: Mix warm water, sugar, and yeast in a bowl. Let it sit for 5-10 minutes until frothy. This step reminds me of watching Mama Lou’s patience as she waited for her dough to rise, knowing that good things take time.
- In a large bowl, combine the flour and salt. Add the yeast mixture and olive oil. Stir until a shaggy dough forms.
- Knead the dough on a floured surface for about 8-10 minutes until smooth and elastic. If you’re like me and Ouma, you might sneak a few bites of the dough—it’s part of the fun!
- Place the dough in a lightly oiled bowl, cover with a damp towel, and let it rise in a warm spot for 1 to 1.5 hours until doubled in size. This pause gives you time to prep your fillings—slice veggies, shred cheese, and get sauce ready.
- Once risen, punch down the dough and divide it into 6 equal pieces. Roll each into a ball, then flatten into a 6-inch circle using a rolling pin.
- Preheat your pie iron over medium heat, and lightly grease both sides with cooking spray or butter. This step is crucial to prevent sticking, a trick Mama Lou always emphasized.
- Place one dough circle on the pie iron. Spoon 2 tablespoons of pizza sauce onto the center, add 1/4 cup cheese, and your choice of toppings. Be careful not to overfill to avoid leaks.
- Top with another dough circle. Seal the edges by pressing firmly around the perimeter, ensuring the dough sticks together.
- Close the pie iron and cook over your heat source (campfire coals or stovetop) for about 4-5 minutes per side. Open carefully to check for a golden brown crust. If needed, cook a little longer, but watch closely to prevent burning.
- Remove the pockets using tongs and let cool for a few minutes before enjoying. I always remind Ouma (and myself) to be patient here—the cheese inside is molten hot!
- Prep Time: 15 minutes
- Cook Time: 30 minutes
- Category: Main Dish
- Method: Cooking
- Cuisine: International
Steps to Create Your Pie Iron Pizza Pockets
- Start by activating your yeast: Mix warm water, sugar, and yeast in a bowl. Let it sit for 5-10 minutes until frothy. This step reminds me of watching Mama Lou’s patience as she waited for her dough to rise, knowing that good things take time.
- In a large bowl, combine the flour and salt. Add the yeast mixture and olive oil. Stir until a shaggy dough forms.
- Knead the dough on a floured surface for about 8-10 minutes until smooth and elastic. If you’re like me and Ouma, you might sneak a few bites of the dough—it’s part of the fun!
- Place the dough in a lightly oiled bowl, cover with a damp towel, and let it rise in a warm spot for 1 to 1.5 hours until doubled in size. This pause gives you time to prep your fillings—slice veggies, shred cheese, and get sauce ready.
- Once risen, punch down the dough and divide it into 6 equal pieces. Roll each into a ball, then flatten into a 6-inch circle using a rolling pin.
- Preheat your pie iron over medium heat, and lightly grease both sides with cooking spray or butter. This step is crucial to prevent sticking, a trick Mama Lou always emphasized.
- Place one dough circle on the pie iron. Spoon 2 tablespoons of pizza sauce onto the center, add 1/4 cup cheese, and your choice of toppings. Be careful not to overfill to avoid leaks.
- Top with another dough circle. Seal the edges by pressing firmly around the perimeter, ensuring the dough sticks together.
- Close the pie iron and cook over your heat source (campfire coals or stovetop) for about 4-5 minutes per side. Open carefully to check for a golden brown crust. If needed, cook a little longer, but watch closely to prevent burning.
- Remove the pockets using tongs and let cool for a few minutes before enjoying. I always remind Ouma (and myself) to be patient here—the cheese inside is molten hot!
Tips for Making the Best Pie Iron Pizza Pockets
- Don’t rush the dough rising—it’s the secret to a tender, fluffy crust that Mama Lou swore by.
- Keep your fillings balanced; too much sauce or cheese can make sealing tricky and cause leaks.
- Grease your pie iron well before each pocket to avoid sticking, especially if you’re cooking on a campfire where cleaning is tougher.
- Experiment with flavor combos! Ouma loves mixing spicy pepperoni with sweet pineapple, while I prefer classic margherita with fresh basil.
- If you don’t have a pie iron, a heavy skillet with a lid can work in a pinch—just press the edges firmly and cook on medium-low heat.
- Practice safe handling—the pie iron and pockets get very hot, so use heat-resistant gloves or tongs.
Serving Suggestions and Pairings
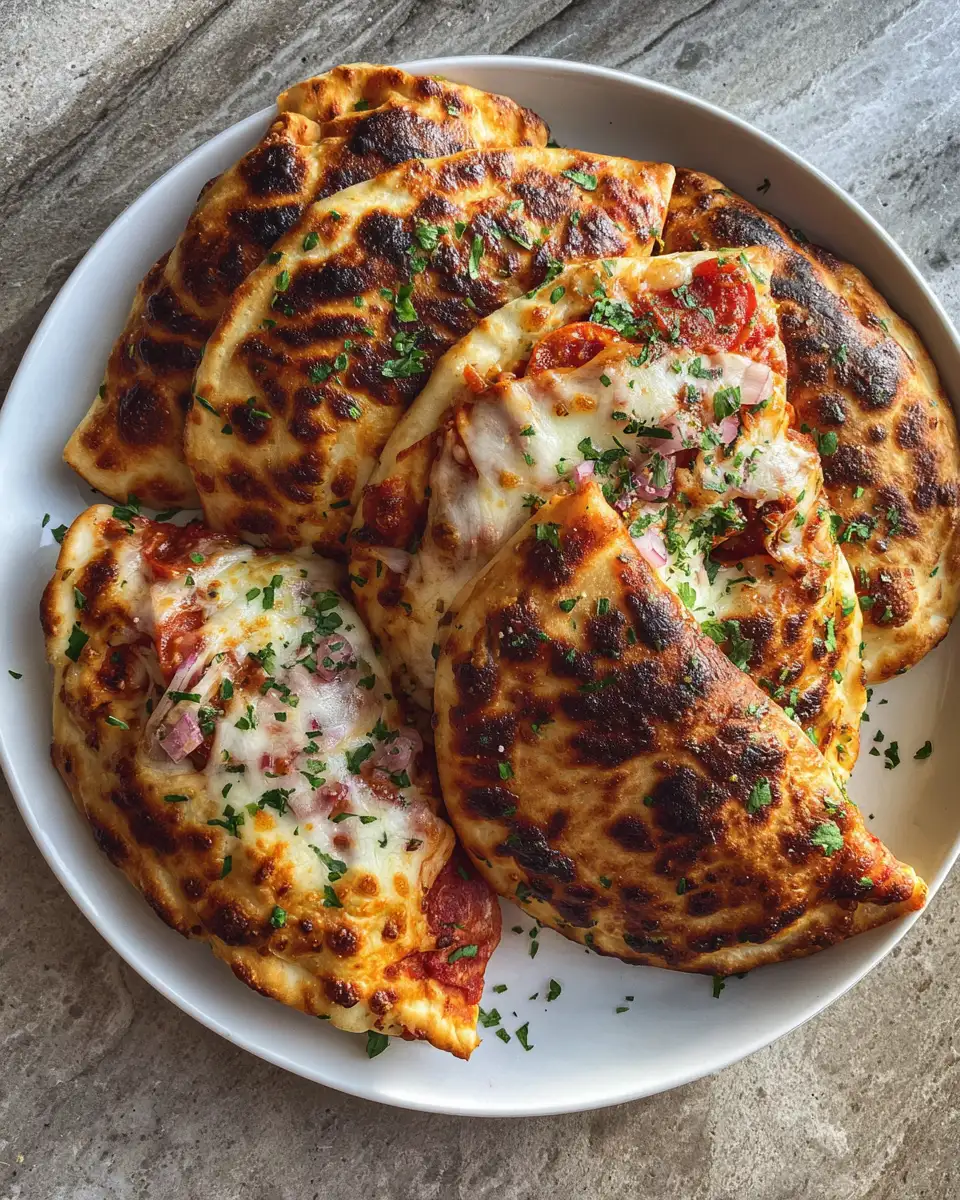
Pie Iron Pizza Pockets are wonderfully portable and filling on their own, but I love pairing them with simple, fresh sides to round out the meal. A crisp green salad with lemon vinaigrette cuts through the richness nicely. When we’re outside by the fire, Ouma and I often bring along sliced apples or a light coleslaw to add crunch and freshness.
For dipping, a small bowl of extra pizza sauce or a garlicky ranch dressing makes every bite extra special. On chilly evenings, I serve these pockets alongside a warm tomato soup, a comforting homage to the soups Mama Lou used to make on cold winter nights.
Storage and Reheating Tips
Leftover Pie Iron Pizza Pockets are surprisingly good the next day. Wrap them individually in foil or plastic wrap and store in the refrigerator for up to 3 days. To reheat, I recommend popping them in a toaster oven or conventional oven at 350°F for about 10 minutes to revive that crispy crust. A quick reheat in a skillet over medium heat works too, especially if you want the crust extra crunchy.
Avoid microwaving if possible, as it tends to make the crust soft and soggy—something Mama Lou never compromised on. If freezing, wrap the cooled pockets tightly and freeze for up to 2 months. Thaw overnight in the fridge before reheating.
Frequently Asked Questions
What are the main ingredients for Pie Iron Pizza Pockets?
The main ingredients for Pie Iron Pizza Pockets include the items listed in our ingredients section above. Each ingredient plays a crucial role in achieving the perfect flavor and texture.
How long does it take to make Pie Iron Pizza Pockets?
The total time to make Pie Iron Pizza Pockets includes both preparation and cooking time. Check the recipe card above for exact timing details.
Can I make Pie Iron Pizza Pockets ahead of time?
Yes, Pie Iron Pizza Pockets can often be prepared in advance. Store it properly in an airtight container in the refrigerator and consume within the recommended timeframe.
What can I serve with Pie Iron Pizza Pockets?
Pie Iron Pizza Pockets pairs well with various sides and accompaniments. Consider the serving suggestions mentioned in the recipe for the best dining experience.
Is Pie Iron Pizza Pockets suitable for special diets?
Depending on the ingredients used, Pie Iron Pizza Pockets may be adapted for various dietary needs. Check the ingredients list and consider substitutions as needed for your dietary requirements.
Final Thoughts
Pie Iron Pizza Pockets are more than just a meal to me—they’re a way to relive the warmth and love of family, just like the afternoons spent cooking alongside Mama Lou and Ouma. Each crispy, cheesy pocket carries a story, a moment, and a tradition that I’m proud to share with you. Whether you’re around a campfire, in your kitchen, or gathered with loved ones, these pockets invite you to slow down, create together, and savor simple joys.
“The best recipes are those that feed both the belly and the soul.” – Mama Lou
I hope this recipe becomes a cherished part of your family’s story, just as it is in mine. Enjoy every bite, every laugh, and every memory made around the pie iron.