
Chilaquiles have always held a special place in my heart—and on my family’s breakfast table. Growing up, Sunday mornings meant the aroma of Mama Lou’s simmering salsa and the crunch of freshly fried tortillas, a ritual that brought my sister Ouma and me running to the kitchen. That warm, comforting dish wasn’t just food; it was a celebration of tradition, family, and love. Today, I want to share my take on chilaquiles, a recipe rooted in those cherished memories but with a little twist that makes it my own. Whether you’re craving a lazy weekend breakfast or a cozy brunch with loved ones, this recipe invites you into our kitchen and stories.
Why You’ll Love This Chilaquiles
Chilaquiles are pure magic—a perfect blend of crispy, saucy, spicy, and cheesy all in one bite. What I adore most about this dish is its versatility. It’s a humble recipe that transforms simple ingredients like tortillas and salsa into something soulful and satisfying. For me, chilaquiles are more than a meal; they’re a connection to Mama Lou’s kitchen, where she’d always say, “Food feeds the soul.” She taught me that cooking is about heart, not just technique. This dish carries that wisdom forward.
Whether you’re making chilaquiles for the first time or revisiting a beloved classic, it’s a great way to use up leftover tortillas and salsa, turning what might seem like scraps into a delicious feast. Plus, it’s quick enough for busy mornings but impressive enough to share with family and friends. I remember sitting at the table with Ouma, our plates piled high, laughing and savoring every bite. This recipe brings back that warmth and joy.
Ingredients You’ll Need for This Chilaquiles

- 8 corn tortillas, cut into wedges
- 2 cups salsa verde (homemade or store-bought; for a fresher taste, I like roasting tomatillos and blending with onion, garlic, and jalapeño)
- 1/2 cup vegetable oil (or use avocado oil for a healthier option)
- 1 cup cooked shredded chicken (optional, but my family loves the added protein)
- 1/2 cup crumbled queso fresco or feta cheese
- 1/4 cup chopped fresh cilantro
- 1/4 cup diced white onion
- 2 large eggs (fried or scrambled, to top)
- Salt and pepper, to taste
- 1 avocado, sliced (for garnish)
- 1/2 cup Mexican crema or sour cream (optional)
- Lime wedges, for serving
Substitution tips: If you prefer red salsa, feel free to swap the salsa verde for your favorite red salsa recipe or store-bought version. For a vegetarian version, omit the chicken and add black beans or sautéed mushrooms for added texture. Corn tortillas can be replaced with flour tortillas if needed, though I find corn tortillas give the authentic crunch and flavor Mama Lou loved.
Nutrition Facts
- Calories: Approximately 450 per serving (including toppings and chicken)
- Protein: 25g (with chicken and eggs)
- Fat: 22g (from oil, cheese, and eggs)
- Carbohydrates: 38g
- Fiber: 6g
- Sugar: 5g (mainly from salsa and onion)
- Sodium: 750mg (varies depending on cheese and salsa)
These nutrition facts reflect a hearty portion, perfect for a fulfilling breakfast or brunch. The protein from eggs and chicken keeps you satisfied, while the fiber from corn tortillas and fresh veggies helps with digestion. Of course, you can adjust ingredients to suit your dietary needs—Mama Lou always reminded me, “Balance is the key to enjoying food and life.” Learn more: Ultimate Breakfast Poutine with Creamy Hollandaise Sauce You Need to Try
Print
The Ultimate Guide to Authentic Chilaquiles That Will Spice Up Your Breakfast
Learn how to make delicious Chilaquiles. Easy recipe with step-by-step instructions.
- Total Time: 45 minutes
- Yield: 4 servings 1x
Ingredients
- 8 corn tortillas, cut into wedges
- 2 cups salsa verde (homemade or store-bought; for a fresher taste, I like roasting tomatillos and blending with onion, garlic, and jalapeño)
- 1/2 cup vegetable oil (or use avocado oil for a healthier option)
- 1 cup cooked shredded chicken (optional, but my family loves the added protein)
- 1/2 cup crumbled queso fresco or feta cheese
- 1/4 cup chopped fresh cilantro
- 1/4 cup diced white onion
- 2 large eggs (fried or scrambled, to top)
- Salt and pepper, to taste
- 1 avocado, sliced (for garnish)
- 1/2 cup Mexican crema or sour cream (optional)
- Lime wedges, for serving
Substitution tips: If you prefer red salsa, feel free to swap the salsa verde for your favorite red salsa recipe or store-bought version. For a vegetarian version, omit the chicken and add black beans or sautéed mushrooms for added texture. Corn tortillas can be replaced with flour tortillas if needed, though I find corn tortillas give the authentic crunch and flavor Mama Lou loved.
Instructions
- Heat the vegetable oil in a large skillet over medium-high heat. When hot, add the tortilla wedges in batches and fry until golden and crispy, about 2-3 minutes per side. Remove with a slotted spoon and drain on paper towels. This step brings back memories of Mama Lou carefully frying tortillas while singing softly in the kitchen.
- In the same skillet, remove excess oil, leaving about 1 tablespoon for flavor. Pour in the salsa verde and simmer over medium heat for 5 minutes, stirring occasionally. The aroma of the simmering salsa always reminds me of Sunday mornings with Ouma, when the house felt alive and full of promise.
- Add the crispy tortilla chips back into the skillet with the salsa, gently stirring to coat the chips evenly. Cook for 2-3 minutes until the chips start to soften but still hold some crunch. This is the magic moment when the textures blend beautifully.
- If using, stir in the shredded chicken and warm through for another 2 minutes. Season with salt and pepper to taste. I love adding chicken here because it makes the dish a complete meal, just like Mama Lou used to do when we had big family breakfasts.
- While the chilaquiles cook, fry or scramble the eggs to your liking in a separate pan. I always prefer a runny yolk to drizzle over the chilaquiles—it’s pure comfort.
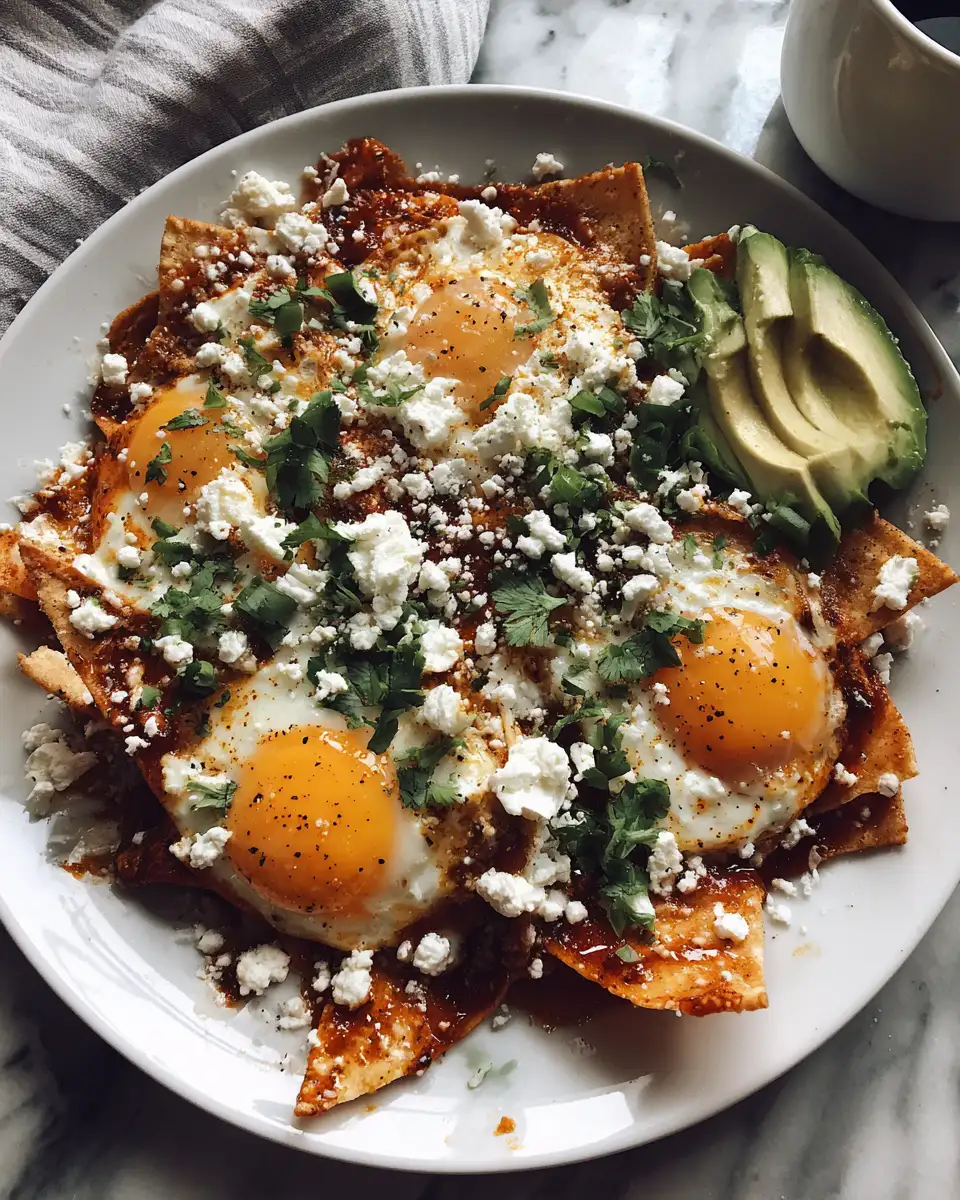
- Serve the chilaquiles hot, topped with crumbled queso fresco, chopped cilantro, diced onion, avocado slices, and a dollop of crema or sour cream. Don’t forget a squeeze of fresh lime to brighten everything up. Sharing this plate with Ouma often meant passing around the lime wedges and laughing at our messy fingers.
- Prep Time: 15 minutes
- Cook Time: 30 minutes
- Category: Main Dish
- Method: Cooking
- Cuisine: International
Steps to Create Your Chilaquiles
- Heat the vegetable oil in a large skillet over medium-high heat. When hot, add the tortilla wedges in batches and fry until golden and crispy, about 2-3 minutes per side. Remove with a slotted spoon and drain on paper towels. This step brings back memories of Mama Lou carefully frying tortillas while singing softly in the kitchen.
- In the same skillet, remove excess oil, leaving about 1 tablespoon for flavor. Pour in the salsa verde and simmer over medium heat for 5 minutes, stirring occasionally. The aroma of the simmering salsa always reminds me of Sunday mornings with Ouma, when the house felt alive and full of promise.
- Add the crispy tortilla chips back into the skillet with the salsa, gently stirring to coat the chips evenly. Cook for 2-3 minutes until the chips start to soften but still hold some crunch. This is the magic moment when the textures blend beautifully.
- If using, stir in the shredded chicken and warm through for another 2 minutes. Season with salt and pepper to taste. I love adding chicken here because it makes the dish a complete meal, just like Mama Lou used to do when we had big family breakfasts.
- While the chilaquiles cook, fry or scramble the eggs to your liking in a separate pan. I always prefer a runny yolk to drizzle over the chilaquiles—it’s pure comfort.
- Serve the chilaquiles hot, topped with crumbled queso fresco, chopped cilantro, diced onion, avocado slices, and a dollop of crema or sour cream. Don’t forget a squeeze of fresh lime to brighten everything up. Sharing this plate with Ouma often meant passing around the lime wedges and laughing at our messy fingers.
Tips for Making the Best Chilaquiles
- Use fresh tortillas for frying whenever possible—day-old tortillas can be too dry and brittle.
- Don’t soak the chips too long in the salsa; you want a mix of crispy and soft textures.
- Homemade salsa always elevates the dish. Mama Lou’s secret was roasting the tomatillos and jalapeños to deepen the flavor.
- Customize your heat level by adjusting the type and amount of chili in the salsa.
- Frying eggs with a soft yolk adds richness and a beautiful contrast in texture.
- Garnish generously with fresh herbs and cheese to brighten the flavors and add layers.
- For a lighter version, bake the tortilla wedges instead of frying—just toss them with a little oil and bake at 400°F for 10-12 minutes until crisp.
Serving Suggestions and Pairings

Chilaquiles are a full meal on their own, but I love pairing them with simple sides that complement their flavors and textures. One of my favorite memories is sharing chilaquiles with a side of refried black beans and freshly sliced mango in the warm sunlit kitchen with Ouma. Here are some ideas to round out your meal:
- Refried black or pinto beans for creaminess and protein
- Fresh fruit salad with tropical fruits like pineapple, mango, and papaya
- A crisp green salad with lime vinaigrette to cut through the richness
- Freshly brewed Mexican coffee or a cold horchata for a refreshing drink
- Warm corn or flour tortillas on the side, for wrapping or scooping
Storage and Reheating Tips
Chilaquiles are best enjoyed fresh, but I understand sometimes you need to save leftovers. When storing, keep the tortilla chips separate from the salsa if possible to prevent sogginess. Here’s what I recommend:
- Store leftover chilaquiles in an airtight container in the refrigerator for up to 2 days.
- If chips and salsa are mixed, expect some softening—reheat gently on the stovetop over low heat to avoid breaking down the texture further.
- Reheat eggs separately, or cook fresh eggs to top the reheated chilaquiles.
- To revive some crispiness, briefly toast leftover chips in a hot oven or skillet before adding salsa.
Ouma once joked that reheated chilaquiles were “like a second chance to savor the soul of Sunday breakfast,” and I couldn’t agree more.
Frequently Asked Questions
What are the main ingredients for Chilaquiles?
The main ingredients for Chilaquiles include the items listed in our ingredients section above. Each ingredient plays a crucial role in achieving the perfect flavor and texture.
How long does it take to make Chilaquiles?
The total time to make Chilaquiles includes both preparation and cooking time. Check the recipe card above for exact timing details.
Can I make Chilaquiles ahead of time?
Yes, Chilaquiles can often be prepared in advance. Store it properly in an airtight container in the refrigerator and consume within the recommended timeframe.
What can I serve with Chilaquiles?
Chilaquiles pairs well with various sides and accompaniments. Consider the serving suggestions mentioned in the recipe for the best dining experience.
Is Chilaquiles suitable for special diets?
Depending on the ingredients used, Chilaquiles may be adapted for various dietary needs. Check the ingredients list and consider substitutions as needed for your dietary requirements.
Final Thoughts
Chilaquiles are much more than a beloved Mexican dish—they’re a bridge across generations, a symbol of family love, and a celebration of simple, heartfelt cooking. Every time I make this recipe, I feel Mama Lou’s presence in the kitchen and remember the laughter Ouma and I shared over our plates piled high. I hope this recipe invites you to create your own memories, whether you’re cooking for yourself or gathering loved ones around the table. Food like this reminds us that the best meals come from tradition, care, and a little bit of soul.
“In every bite of chilaquiles, I taste the stories of my family—stories of love, resilience, and joy.”