

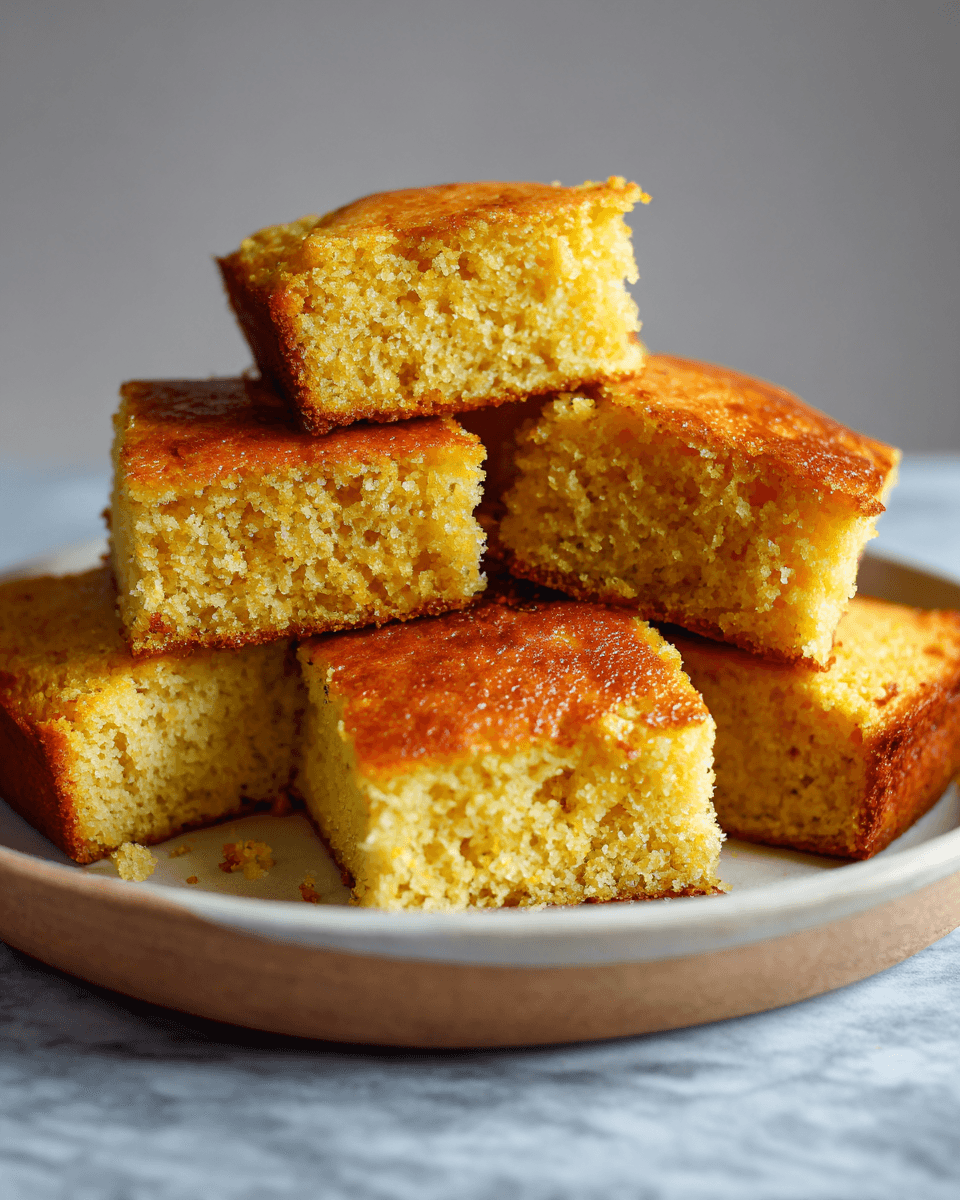
Skillet cornbread has always been more than just a side dish in my kitchen—it carries the warmth of family gatherings and the comforting scent of Mama Lou’s old cast iron sizzling away on the stove. I remember sitting by the stove as a child, watching the golden batter bubble and rise, the edges crisping just right under Mama Lou’s careful eye. This recipe, passed down through generations and lovingly tweaked with my sister Ouma by my side, brings that same heartwarming feeling to your table. Whether you’re new to cornbread or a seasoned lover of Southern classics, this skillet cornbread recipe will wrap you in nostalgia and flavor with every bite.
Table of Contents
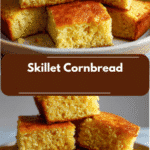
Why You’ll Love This Skillet Cornbread
There’s something magical about skillet cornbread that frozen or boxed mixes just can’t replicate. The way the cast iron crisps the edges while keeping the inside tender is pure magic. This recipe is a tribute to those moments with Mama Lou, who always said that good cornbread is like a hug from the kitchen. The balance of sweetness and savory notes makes it perfect for everything from chili nights to Sunday roasts.
When my sister Ouma and I first started cooking together, this was always our go-to recipe. It’s forgiving and straightforward, and it never fails to bring a smile to the table. Plus, cooking it in a skillet means you get that beautiful crust and a rustic appeal that guests always admire. It’s a simple recipe but full of heart—a true reflection of family traditions and soulful cooking.
Ingredients You’ll Need for This Skillet Cornbread
- 1 cup yellow cornmeal (medium grind)
- 1 cup all-purpose flour (can substitute with whole wheat flour for a nuttier flavor)
- 1/4 cup granulated sugar (reduce to 2 tablespoons if you prefer less sweetness)
- 1 tablespoon baking powder
- 1/2 teaspoon salt
- 1 cup buttermilk (or 1 cup milk + 1 tablespoon lemon juice, let sit 5 minutes)
- 2 large eggs
- 1/4 cup unsalted butter, melted (plus extra for the skillet)
- Optional: 1/2 cup corn kernels for extra texture
Nutrition Facts
- Calories: Approximately 220 per serving (1/8 of the skillet)
- Protein: 5g
- Fat: 9g (mostly from butter)
- Carbohydrates: 30g
- Fiber: 2g
- Sugar: 6g
- Sodium: 350mg

Golden Goodness Skillet Cornbread Recipe You Need to Try
Learn how to make delicious Skillet Cornbread. Easy recipe with step-by-step instructions.
- Total Time: 45 minutes
- Yield: 4 servings 1x
Ingredients
- 1 cup yellow cornmeal (medium grind)
- 1 cup all-purpose flour (can substitute with whole wheat flour for a nuttier flavor)
- 1/4 cup granulated sugar (reduce to 2 tablespoons if you prefer less sweetness)
- 1 tablespoon baking powder
- 1/2 teaspoon salt
- 1 cup buttermilk (or 1 cup milk + 1 tablespoon lemon juice, let sit 5 minutes)
- 2 large eggs
- 1/4 cup unsalted butter, melted (plus extra for the skillet)
- Optional: 1/2 cup corn kernels for extra texture
Instructions
- Preheat your oven to 425°F (220°C). Place a 10-inch cast iron skillet in the oven to heat while you prepare the batter. Mama Lou always insisted the skillet must be hot to get that perfect crust.
- In a large bowl, whisk together the cornmeal, flour, sugar, baking powder, and salt until fully combined.
- In a separate bowl, beat the eggs and then stir in the buttermilk and melted butter.
- Pour the wet ingredients into the dry ingredients and gently fold together until just combined. Don’t overmix—lumps are okay and keep the bread tender.
- If you want extra texture, fold in corn kernels here. Ouma loves adding them for a little bite.
- Carefully remove the hot skillet from the oven (use oven mitts!) and add a tablespoon of butter, swirling it around until melted and coating the bottom and sides.
- Pour the batter into the hot skillet and smooth the top with a spatula.
- Bake for 20-25 minutes, or until the top is golden brown and a toothpick inserted into the center comes out clean.
- Let the cornbread cool in the skillet for 10 minutes before slicing. This resting time allows the flavors to settle and the crust to firm up just right.
- Prep Time: 15 minutes
- Cook Time: 30 minutes
- Category: Main Dish
- Method: Cooking
- Cuisine: International
Steps to Create Your Skillet Cornbread
- Preheat your oven to 425°F (220°C). Place a 10-inch cast iron skillet in the oven to heat while you prepare the batter. Mama Lou always insisted the skillet must be hot to get that perfect crust.
- In a large bowl, whisk together the cornmeal, flour, sugar, baking powder, and salt until fully combined.
- In a separate bowl, beat the eggs and then stir in the buttermilk and melted butter.
- Pour the wet ingredients into the dry ingredients and gently fold together until just combined. Don’t overmix—lumps are okay and keep the bread tender.
- If you want extra texture, fold in corn kernels here. Ouma loves adding them for a little bite.
- Carefully remove the hot skillet from the oven (use oven mitts!) and add a tablespoon of butter, swirling it around until melted and coating the bottom and sides.
- Pour the batter into the hot skillet and smooth the top with a spatula.
- Bake for 20-25 minutes, or until the top is golden brown and a toothpick inserted into the center comes out clean.
- Let the cornbread cool in the skillet for 10 minutes before slicing. This resting time allows the flavors to settle and the crust to firm up just right.
Tips for Making the Best Skillet Cornbread
One lesson Mama Lou taught me that I carry to every kitchen is the importance of patience and respect for ingredients. Letting the skillet get truly hot before adding the batter is the secret to that prized crispy edge. Another tip is to never overmix the batter; a gentle fold keeps the cornbread moist and tender.
When Ouma and I make this together, we sometimes swap out the sugar for honey or maple syrup for a richer sweetness. If you like a little kick, adding a pinch of cayenne or chopped jalapeños can brighten the flavor beautifully. And don’t skip the resting time—though it’s tempting to dig in immediately, the cornbread tastes best when it’s had a moment to breathe. Learn more: Irresistible Mozzarella Pepperoni Croissant Rolls You Need to Try
Serving Suggestions and Pairings

Skillet cornbread is the perfect partner for so many dishes. I often serve it alongside a hearty bowl of Mama Lou’s beef stew or with a spicy pot of chili on cold evenings. One of my fondest memories is how Ouma and I would crumble warm cornbread over our chili, letting the bread soak up the juices and create a comforting mess that only sisters could appreciate.
For a lighter touch, try it with butter and a drizzle of honey, or alongside a fresh green salad for a balanced meal. It also pairs beautifully with Southern-style BBQ, fried chicken, or even a simple bowl of creamy soup. The warm, slightly sweet cornbread cuts through rich and spicy flavors, making it a versatile staple in any kitchen.
Storage and Reheating Tips
Leftover skillet cornbread holds up wonderfully if stored properly. Wrap it tightly in plastic wrap or place it in an airtight container and keep it in the refrigerator for up to 3 days. When you want to enjoy it again, I recommend reheating in a warm oven at 350°F for about 10 minutes to restore that crisp edge and softness inside.
If you’re short on time, reheating slices in the microwave works too, though you might lose a bit of that characteristic crust. For longer storage, cornbread freezes well—wrap it tightly in foil and place in a freezer bag. Thaw overnight in the fridge, then warm in the oven before serving.
Frequently Asked Questions
What are the main ingredients for Skillet Cornbread?
The main ingredients for Skillet Cornbread include the items listed in our ingredients section above. Each ingredient plays a crucial role in achieving the perfect flavor and texture.
How long does it take to make Skillet Cornbread?
The total time to make Skillet Cornbread includes both preparation and cooking time. Check the recipe card above for exact timing details.
Can I make Skillet Cornbread ahead of time?
Yes, Skillet Cornbread can often be prepared in advance. Store it properly in an airtight container in the refrigerator and consume within the recommended timeframe.
What can I serve with Skillet Cornbread?
Skillet Cornbread pairs well with various sides and accompaniments. Consider the serving suggestions mentioned in the recipe for the best dining experience.
Is Skillet Cornbread suitable for special diets?
Depending on the ingredients used, Skillet Cornbread may be adapted for various dietary needs. Check the ingredients list and consider substitutions as needed for your dietary requirements.
Final Thoughts
Making skillet cornbread is more than just following a recipe—it’s stepping into a story that started long before I tied on my apron. It’s the echo of Mama Lou’s laughter as she pulled that bubbling skillet from the oven, the shared smiles between Ouma and me as we perfected the recipe together, and the simple joy of gathering around the table with loved ones. This cornbread carries all of that history, warmth, and love in every crumb.
Whether you’re feeding a crowd or enjoying a quiet night in, I hope this skillet cornbread brings you the same comfort and connection it has given me. It’s a humble dish, but one that holds a world of memories—and now, it can be a part of yours too.


