

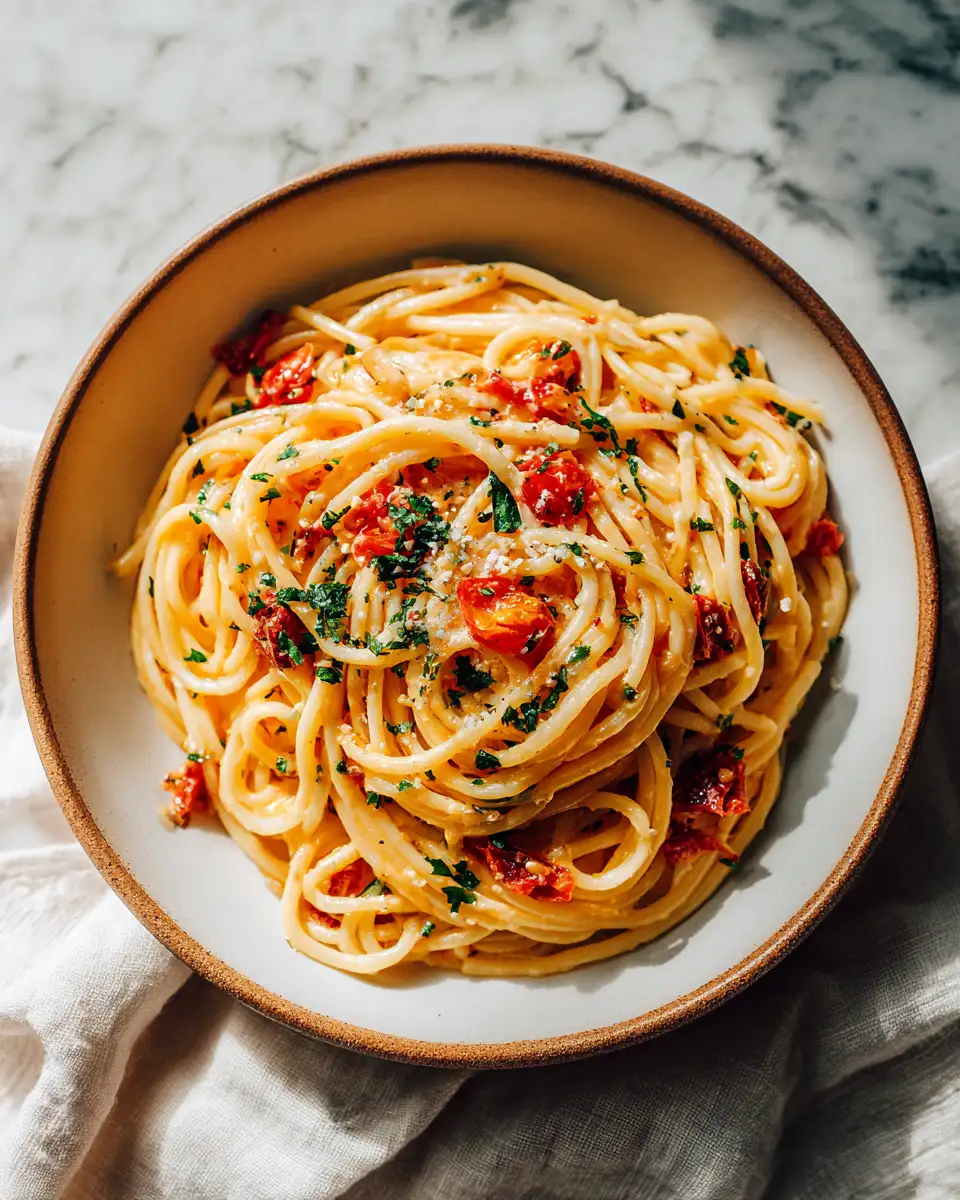
There’s something so deeply comforting about rolling out fresh pasta dough, especially when you have a trusty pasta recipe kitchenaid attachment by your side. It takes me back to the kitchen of my beloved Mama Lou, where the air was always filled with the mingling scents of garlic, basil, and warm dough resting on the wooden counter. Using my KitchenAid pasta roller isn’t just about convenience—it’s about connecting with those cherished family memories, and sharing the love and tradition that shaped my own cooking journey. Whether I’m cooking with my sister Ouma or reminiscing about those weekend afternoons with Mama Lou, this pasta recipe with a KitchenAid always brings us closer to that heart of home.
Table of Contents
Why You’ll Love This pasta recipe kitchenaid
When I first introduced the KitchenAid pasta attachment into my kitchen, I was amazed at how it transformed what used to be a laborious, time-consuming task into a joyful, creative process. This pasta recipe kitchenaid method not only cuts down on effort but also lets you control every ingredient, giving you fresh, silky pasta that’s far superior to anything store-bought. It’s perfect for anyone who wants to dive into homemade pasta without feeling overwhelmed.
But beyond the practical side, it’s the emotional connection that makes this recipe so special. Using the KitchenAid brings back the magic of learning to make pasta with Mama Lou, who never rushed the dough or the moment. She said, “Good pasta is like good conversation—it needs patience and heart.” Whether you’re a busy parent, a novice cook, or someone who just craves that homemade touch, this pasta recipe kitchenaid will feel like a warm hug from the past, wrapped in flour and tradition.
Ingredients You’ll Need for This pasta recipe kitchenaid
- 2 cups all-purpose flour (or “00” flour for a silkier dough)
- 3 large eggs, at room temperature
- 1 tablespoon olive oil, plus extra for coating
- 1/2 teaspoon fine sea salt
- Water, as needed (about 1-2 tablespoons)
If you want a gluten-free alternative, I recommend swapping the all-purpose flour for a blend of chickpea flour and rice flour, but keep in mind the texture will be different from traditional pasta. For a richer dough, try substituting one egg with an egg yolk, a trick Mama Lou taught me when making pasta for special family dinners.
Nutrition Facts
- Calories: Approximately 220 per serving (about 1 cup cooked)
- Protein: 8g
- Fat: 7g (mostly from eggs and olive oil)
- Carbohydrates: 30g
- Fiber: 1g
- Sugar: 1g
- Sodium: 150mg
These numbers can vary slightly depending on your choice of flour and portion size. I always remind my readers that fresh pasta is a wholesome base, perfect for pairing with nutrient-rich sauces and vegetables to make a balanced meal.
Print
Perfect Pasta Recipe Made Easy with Your KitchenAid Mixer
Learn how to make delicious pasta recipe kitchenaid. Easy recipe with step-by-step instructions.
- Total Time: 45 minutes
- Yield: 4 servings 1x
Ingredients
- 2 cups all-purpose flour (or “00” flour for a silkier dough)
- 3 large eggs, at room temperature
- 1 tablespoon olive oil, plus extra for coating
- 1/2 teaspoon fine sea salt
- Water, as needed (about 1-2 tablespoons)
If you want a gluten-free alternative, I recommend swapping the all-purpose flour for a blend of chickpea flour and rice flour, but keep in mind the texture will be different from traditional pasta. For a richer dough, try substituting one egg with an egg yolk, a trick Mama Lou taught me when making pasta for special family dinners.
Instructions
- Set up your KitchenAid stand mixer with the dough hook attachment. In the mixing bowl, combine the flour and salt, mixing briefly to distribute evenly.
- Crack the eggs into a small bowl, whisk gently, then pour into the flour mixture along with the olive oil.
- Turn the mixer on low speed, allowing the dough hook to slowly bring the ingredients together. If the dough feels too dry or crumbly, add water 1 tablespoon at a time until the dough forms a cohesive ball.
- Once the dough pulls away from the sides of the bowl and forms a smooth ball (about 3-4 minutes), remove it and wrap it tightly in plastic wrap. Let it rest at room temperature for at least 30 minutes. This step is key—Mama Lou always said, “The dough needs a nap before the work begins.”
- Attach the pasta roller to your KitchenAid. Divide the dough into 4 equal pieces to make it easier to work with.
- Set the roller to the widest setting (usually #1) and flatten the dough gently with your hands or a rolling pin to fit through the roller.
- Feed one piece of dough through the roller. Fold the dough in half and pass it through again. Repeat this folding and rolling 3-4 times to develop gluten for elasticity.
- Gradually reduce the roller setting by one notch each time, passing the dough through once at each setting until you reach the desired thickness (usually setting #6 or #7 for fettuccine or tagliatelle).
- Attach the pasta cutter on your KitchenAid and feed the rolled dough through to create your desired pasta shape.
- Lay the cut pasta on a floured surface or hang it on a drying rack for about 15 minutes before cooking.
- Cook the pasta in a large pot of salted boiling water for 2-3 minutes or until al dente. Fresh pasta cooks much faster than dried!
- Drain the pasta, reserving a cup of pasta water to adjust your sauce consistency if needed.
One of my favorite memories is sitting beside Ouma as she carefully fed each dough sheet through the roller, her hands steady but patient, always reminding me to “treat the dough like it’s a living thing.” It’s that tenderness that truly makes the difference.
- Prep Time: 15 minutes
- Cook Time: 30 minutes
- Category: Main Dish
- Method: Cooking
- Cuisine: International
Steps to Create Your pasta recipe kitchenaid
- Set up your KitchenAid stand mixer with the dough hook attachment. In the mixing bowl, combine the flour and salt, mixing briefly to distribute evenly.
- Crack the eggs into a small bowl, whisk gently, then pour into the flour mixture along with the olive oil.
- Turn the mixer on low speed, allowing the dough hook to slowly bring the ingredients together. If the dough feels too dry or crumbly, add water 1 tablespoon at a time until the dough forms a cohesive ball.
- Once the dough pulls away from the sides of the bowl and forms a smooth ball (about 3-4 minutes), remove it and wrap it tightly in plastic wrap. Let it rest at room temperature for at least 30 minutes. This step is key—Mama Lou always said, “The dough needs a nap before the work begins.”
- Attach the pasta roller to your KitchenAid. Divide the dough into 4 equal pieces to make it easier to work with.
- Set the roller to the widest setting (usually #1) and flatten the dough gently with your hands or a rolling pin to fit through the roller.
- Feed one piece of dough through the roller. Fold the dough in half and pass it through again. Repeat this folding and rolling 3-4 times to develop gluten for elasticity.
- Gradually reduce the roller setting by one notch each time, passing the dough through once at each setting until you reach the desired thickness (usually setting #6 or #7 for fettuccine or tagliatelle).
- Attach the pasta cutter on your KitchenAid and feed the rolled dough through to create your desired pasta shape.
- Lay the cut pasta on a floured surface or hang it on a drying rack for about 15 minutes before cooking.
- Cook the pasta in a large pot of salted boiling water for 2-3 minutes or until al dente. Fresh pasta cooks much faster than dried!
- Drain the pasta, reserving a cup of pasta water to adjust your sauce consistency if needed.
One of my favorite memories is sitting beside Ouma as she carefully fed each dough sheet through the roller, her hands steady but patient, always reminding me to “treat the dough like it’s a living thing.” It’s that tenderness that truly makes the difference. Learn more: Perfect Pasta for Your Little One: A 7-Month-Old’s Delightful Recipe
Tips for Making the Best pasta recipe kitchenaid
- Use fresh, room-temperature eggs for the best dough texture and richness.
- Don’t rush the dough resting time—this relaxes the gluten and makes rolling easier.
- Lightly flour your workspace and pasta sheets to prevent sticking, but avoid adding too much flour to keep the dough tender.
- Practice makes perfect—your first few batches might not be perfect, but that’s part of the journey, just like Mama Lou always said.
- If the dough tears while rolling, let it rest longer or try rolling again at a thicker setting before moving thinner.
- Experiment with mix-ins like finely chopped herbs or spinach puree for colorful, flavorful pasta variations.
When I was younger, Mama Lou would always remind me, “The kitchen is a place for love, not pressure.” This advice eased my nerves when learning pasta making. Remember, each imperfect noodle carries a story and a step closer to mastery.
Serving Suggestions and Pairings

Fresh pasta deserves simple, fresh accompaniments. When I make this pasta with my sister Ouma, we often keep the sauce light—like a classic garlic and olive oil sauté with fresh herbs, or a bright tomato basil sauce that lets the pasta shine.
Here are some of my favorite pairings that bring out the best in this pasta recipe kitchenaid:
- Garlic, chili flakes, and olive oil with a sprinkle of Parmesan and fresh parsley
- Slow-simmered Bolognese with ground beef and pork, honoring Mama Lou’s Sunday dinners
- Fresh pesto made from basil, pine nuts, garlic, and Parmesan, blended just before serving
- A light lemon cream sauce with peas and crispy pancetta for a fresh springtime dish
- Simple browned butter with sage leaves, a classic comfort that’s quick and elegant
Pair your pasta with a crisp green salad or roasted seasonal vegetables to round out the meal. And don’t forget a crusty loaf of bread to soak up every last bit of sauce—that’s Mama Lou’s way of making sure no love goes to waste!
Storage and Reheating Tips
Sometimes, I make a double batch of pasta dough when I’m in the mood to prep ahead, especially when Ouma and I plan a big family dinner. Here’s how I store and reheat fresh pasta to keep its texture and flavor:
- Refrigerate: Fresh pasta can be stored in an airtight container or wrapped tightly in plastic wrap in the fridge for up to 2 days.
- Freeze: Lay pasta in single layers on a baking sheet dusted with flour. Freeze until solid, then transfer to a freezer bag or container for up to 2 months.
- Cook from frozen: Drop frozen pasta directly into boiling salted water, cooking for an extra 1-2 minutes than fresh pasta.
- Reheat: Leftover cooked pasta is best reheated gently in a skillet with a splash of sauce or olive oil over low heat, rather than microwaving, to maintain texture.
I remember Mama Lou always saying that fresh pasta is best enjoyed fresh, but when you do need to store it, these little tricks keep the spirit of her cooking alive and well.
Frequently Asked Questions
What are the main ingredients for pasta recipe kitchenaid?
The main ingredients for pasta recipe kitchenaid include the items listed in our ingredients section above. Each ingredient plays a crucial role in achieving the perfect flavor and texture.
How long does it take to make pasta recipe kitchenaid?
The total time to make pasta recipe kitchenaid includes both preparation and cooking time. Check the recipe card above for exact timing details.
Can I make pasta recipe kitchenaid ahead of time?
Yes, pasta recipe kitchenaid can often be prepared in advance. Store it properly in an airtight container in the refrigerator and consume within the recommended timeframe.
What can I serve with pasta recipe kitchenaid?
pasta recipe kitchenaid pairs well with various sides and accompaniments. Consider the serving suggestions mentioned in the recipe for the best dining experience.
Is pasta recipe kitchenaid suitable for special diets?
Depending on the ingredients used, pasta recipe kitchenaid may be adapted for various dietary needs. Check the ingredients list and consider substitutions as needed for your dietary requirements.
Final Thoughts
Making pasta with your KitchenAid is more than just a cooking task—it’s a way to weave family stories, tradition, and love into every meal. This pasta recipe kitchenaid has been a bridge between my past and present, a way to honor Mama Lou’s legacy and share that same warmth with my sister Ouma and everyone who sits at my table.
Whether you’re rolling dough for the first time or looking to elevate your pasta game, remember that the beauty of homemade pasta lies in its imperfections and the memories it creates. So, dust off your KitchenAid, gather your ingredients, and dive into this simple, heartfelt pasta recipe kitchenaid. As Mama Lou would say, “The best meals are made with patience, love, and a little flour on your hands.”


