
Growing up, the kitchen was the heart of our home, where warmth and love were infused into every dish. Brownie Refrigerator Cake was more than just a dessert; it was a symbol of family gatherings, laughter, and shared stories. Mama Lou, my grandmother, would often tell tales of her childhood adventures while whipping up this delightful treat. It was during these moments that I learned the secret ingredient to any recipe: a generous sprinkle of love. As I recreate this cherished dessert today, I’m reminded of those tender memories and the bond it strengthened between us all.
Table of Contents
Why You’ll Love This Brownie Refrigerator Cake
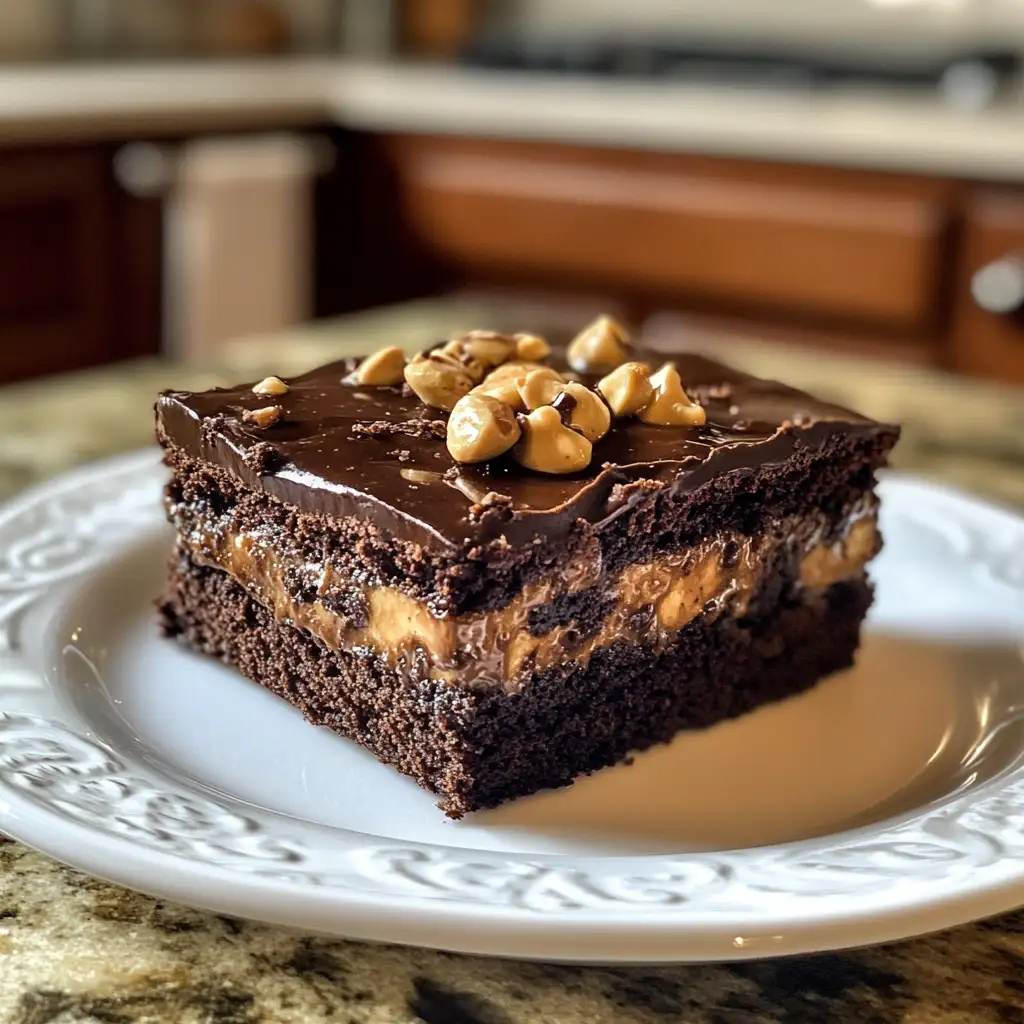
This Brownie Refrigerator Cake is a true testament to the magic that can happen when you combine simple ingredients with heartfelt traditions. With layers of fudgy brownie goodness and a creamy, dreamy filling, this cake is a crowd-pleaser that never fails to impress. What makes it even more special is its no-bake nature, perfect for those hot summer days when you want to avoid turning on the oven. Mama Lou always said that the best recipes are those that bring people together, and this cake does just that. It’s a dessert that invites you to gather around the table and savor every bite.
Ingredients You’ll Need for This Brownie Refrigerator Cake

- 1 box of brownie mix (or homemade brownie batter)
- 1 cup heavy cream
- 1/2 cup powdered sugar
- 1 teaspoon vanilla extract
- 8 ounces cream cheese, softened
- 1/2 cup chocolate chips
- 1/2 cup chopped nuts (optional, for those who like a bit of crunch)
- A pinch of salt
If you’re feeling adventurous, you can substitute the cream cheese with mascarpone for a richer texture. And for those who prefer a nut-free version, simply skip the chopped nuts. It’s all about making the dish your own while staying rooted in tradition.
Nutrition Facts
- Calories: 450 per serving
- Protein: 6g
- Fat: 25g
- Carbohydrates: 56g
- Fiber: 2g
- Sugar: 38g
- Sodium: 210mg

Chill Out with the Ultimate Brownie Refrigerator Cake Delight
Learn how to make delicious Brownie Refrigerator Cake. Easy recipe with step-by-step instructions.
- Total Time: 45 minutes
- Yield: 4 servings 1x
Ingredients
- 1 box of brownie mix (or homemade brownie batter)
- 1 cup heavy cream
- 1/2 cup powdered sugar
- 1 teaspoon vanilla extract
- 8 ounces cream cheese, softened
- 1/2 cup chocolate chips
- 1/2 cup chopped nuts (optional, for those who like a bit of crunch)
- A pinch of salt
If you’re feeling adventurous, you can substitute the cream cheese with mascarpone for a richer texture. And for those who prefer a nut-free version, simply skip the chopped nuts. It’s all about making the dish your own while staying rooted in tradition.
Instructions
- Prepare the brownie mix according to the package instructions or your homemade recipe. Allow it to cool completely.
- While the brownies are cooling, whip the heavy cream with powdered sugar and vanilla extract until soft peaks form. Mama Lou always said that patience is key here; the cream should be fluffy and airy.
- In a separate bowl, beat the softened cream cheese until smooth. Gradually fold in the whipped cream mixture until well combined.
- Once the brownies have cooled, cut them into bite-sized pieces. Layer half of these pieces at the bottom of a serving dish.
- Spread half of the cream cheese mixture over the brownie layer, smoothing it with a spatula.
- Sprinkle half of the chocolate chips and nuts (if using) over the cream layer.
- Repeat the layers with the remaining brownie pieces, cream cheese mixture, chocolate chips, and nuts.
- Cover the dish with plastic wrap and refrigerate for at least 4 hours, or until set. As Mama Lou would say, “Good things come to those who wait.”
- Once set, slice and serve chilled, enjoying each bite as it melts in your mouth.
- Prep Time: 15 minutes
- Cook Time: 30 minutes
- Category: Main Dish
- Method: Cooking
- Cuisine: International
Steps to Create Your Brownie Refrigerator Cake
- Prepare the brownie mix according to the package instructions or your homemade recipe. Allow it to cool completely.
- While the brownies are cooling, whip the heavy cream with powdered sugar and vanilla extract until soft peaks form. Mama Lou always said that patience is key here; the cream should be fluffy and airy.
- In a separate bowl, beat the softened cream cheese until smooth. Gradually fold in the whipped cream mixture until well combined.
- Once the brownies have cooled, cut them into bite-sized pieces. Layer half of these pieces at the bottom of a serving dish.
- Spread half of the cream cheese mixture over the brownie layer, smoothing it with a spatula.
- Sprinkle half of the chocolate chips and nuts (if using) over the cream layer.
- Repeat the layers with the remaining brownie pieces, cream cheese mixture, chocolate chips, and nuts.
- Cover the dish with plastic wrap and refrigerate for at least 4 hours, or until set. As Mama Lou would say, “Good things come to those who wait.”
- Once set, slice and serve chilled, enjoying each bite as it melts in your mouth.
Tips for Making the Best Brownie Refrigerator Cake
Here are some tips to ensure your Brownie Refrigerator Cake is a hit:
“Cooking is like love. It should be entered into with abandon or not at all.” – Mama Lou
Ensure the brownies are completely cooled before layering to prevent the cream from melting. Use high-quality chocolate chips for a richer flavor, and feel free to experiment with different types of nuts or even a drizzle of caramel sauce for an extra touch of indulgence. Remember to taste as you go, adjusting sweetness to your liking. After all, cooking is about expressing yourself while honoring those who taught you.
Serving Suggestions and Pairings

This cake pairs wonderfully with a scoop of vanilla ice cream or a dollop of freshly whipped cream. For a more sophisticated touch, serve it with a glass of dessert wine or a steaming cup of coffee. It’s a versatile dessert that can be dressed up or down, making it suitable for both casual family dinners and elegant gatherings. I remember Mama Lou serving this with homemade raspberry sauce, adding a burst of tartness that complemented the rich chocolate layers beautifully.
Storage and Reheating Tips
Store any leftovers in an airtight container in the refrigerator for up to three days. If you’re planning to enjoy it over a few days, consider keeping the cream and brownie layers separate until just before serving to maintain freshness. While reheating isn’t typically necessary for this chilled dessert, if you prefer it slightly warmer, a brief stint in the microwave (10-15 seconds) will do the trick. But as Mama Lou would say, some things are best enjoyed cold, like a sweet memory on a hot summer day.
Frequently Asked Questions
What are the main ingredients for Brownie Refrigerator Cake?
The main ingredients for Brownie Refrigerator Cake include the items listed in our ingredients section above. Each ingredient plays a crucial role in achieving the perfect flavor and texture.
How long does it take to make Brownie Refrigerator Cake?
The total time to make Brownie Refrigerator Cake includes both preparation and cooking time. Check the recipe card above for exact timing details.
Can I make Brownie Refrigerator Cake ahead of time?
Yes, Brownie Refrigerator Cake can often be prepared in advance. Store it properly in an airtight container in the refrigerator and consume within the recommended timeframe.
What can I serve with Brownie Refrigerator Cake?
Brownie Refrigerator Cake pairs well with various sides and accompaniments. Consider the serving suggestions mentioned in the recipe for the best dining experience.
Is Brownie Refrigerator Cake suitable for special diets?
Depending on the ingredients used, Brownie Refrigerator Cake may be adapted for various dietary needs. Check the ingredients list and consider substitutions as needed for your dietary requirements.
Final Thoughts
Brownie Refrigerator Cake is more than just a dessert; it’s a celebration of family, tradition, and the simple joys of life. Each bite is a reminder of the cherished moments spent in the kitchen with Mama Lou and my sister Ouma, where laughter and love were the main ingredients. I hope this recipe brings as much joy to your table as it has to mine, creating new memories with every slice. Happy baking!