
There’s something inherently comforting about the smell of bread baking, a scent that transports me back to the sunlit kitchen of Mama Lou, my beloved grandmother. It’s where I first learned the magic that hands and flour can create together. Today, I’m sharing a recipe that captures that nostalgia with a twist—Olive Garden Breadsticks. These delightful, soft sticks of heaven have a way of turning an ordinary meal into something extraordinary, just like Mama Lou’s kitchen always did.
Table of Contents
Why You’ll Love This Olive Garden Breadsticks
There’s a reason why Olive Garden Breadsticks have such a devoted following. For me, it’s more than just the garlic-scented goodness; it’s the memories they evoke. The first time I tasted them, I was with my sister Ouma at an Olive Garden in a bustling city far from home. We were trying to recreate the warmth of family dinners, and those breadsticks did just the trick. They’re the perfect balance of soft and chewy, with just the right amount of buttery garlic flavor. Making them at home brings that same joy, with the added bonus of filling your kitchen with the aroma of freshly baked bread.
Ingredients You’ll Need for This Olive Garden Breadsticks

- 2 1/4 teaspoons active dry yeast
- 1 1/2 cups warm water (about 110°F)
- 2 tablespoons sugar
- 3 1/2 cups all-purpose flour
- 2 tablespoons unsalted butter, melted
- 1 3/4 teaspoons salt
- 1/4 cup unsalted butter, melted (for brushing)
- 1 teaspoon garlic powder
- 1/2 teaspoon salt (for topping)
Feel free to substitute whole wheat flour for a portion of the all-purpose flour if you’re looking to add a bit more fiber. You can also use olive oil instead of butter for a slightly different flavor profile that still honors the Italian roots of these breadsticks.
Nutrition Facts
- Calories: 150 per breadstick
- Protein: 3g
- Fat: 4g
- Carbohydrates: 26g
- Fiber: 1g
- Sugar: 1g
- Sodium: 220mg

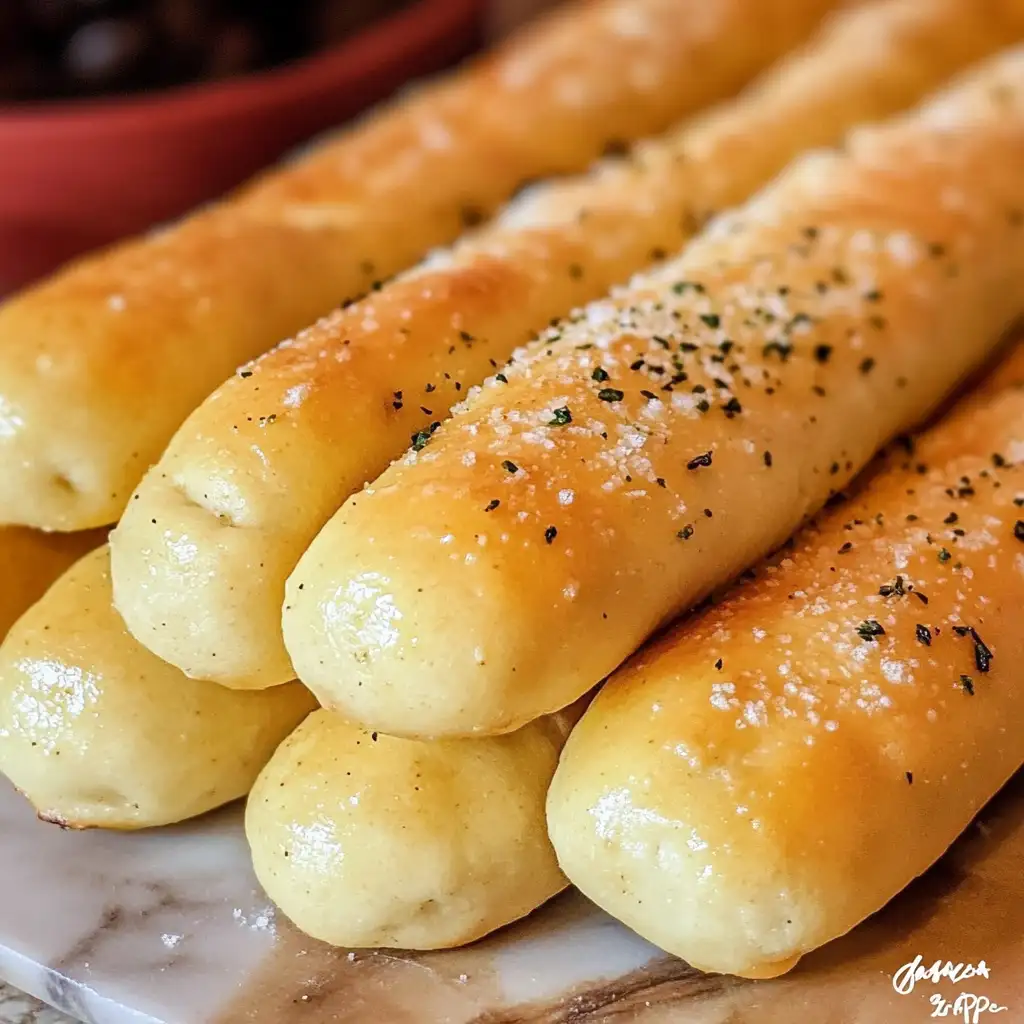
Irresistible Olive Garden Breadsticks Recipe: Unlock the Secret to Perfect Pillowy Goodness
Learn how to make delicious Olive Garden Breadsticks. Easy recipe with step-by-step instructions.
- Total Time: 45 minutes
- Yield: 4 servings 1x
Ingredients
- 2 1/4 teaspoons active dry yeast
- 1 1/2 cups warm water (about 110°F)
- 2 tablespoons sugar
- 3 1/2 cups all-purpose flour
- 2 tablespoons unsalted butter, melted
- 1 3/4 teaspoons salt
- 1/4 cup unsalted butter, melted (for brushing)
- 1 teaspoon garlic powder
- 1/2 teaspoon salt (for topping)
Feel free to substitute whole wheat flour for a portion of the all-purpose flour if you’re looking to add a bit more fiber. You can also use olive oil instead of butter for a slightly different flavor profile that still honors the Italian roots of these breadsticks.
Instructions
- In a small bowl, dissolve the yeast and sugar in warm water. Let it sit for about 5 minutes, or until it becomes frothy. This step always reminds me of the science experiments Ouma and I would conduct in the kitchen, marveling at the process of yeast coming to life.
- In a large mixing bowl, combine the flour and salt. Add the yeast mixture and melted butter. Stir until the dough begins to come together.
- Knead the dough on a floured surface for about 7-10 minutes, until smooth and elastic. Kneading dough always brings me back to standing on a stool next to Mama Lou, my small hands working alongside hers.
- Place the dough in a greased bowl, cover it with a damp cloth, and let it rise in a warm place for about 1 hour, or until doubled in size.
- Preheat your oven to 400°F. Punch down the dough and divide it into 12 equal pieces. Shape each piece into a 7-inch long breadstick.
- Place the breadsticks on a parchment-lined baking sheet. Cover and let them rise again for about 15-20 minutes.
- Bake the breadsticks for 12-15 minutes, or until golden brown. The smell at this point is simply divine, a reminder of the cozy evenings spent in the warmth of family and love.
- While the breadsticks are baking, mix the melted butter, garlic powder, and salt. Brush this mixture over the breadsticks as soon as they come out of the oven.
- Prep Time: 15 minutes
- Cook Time: 30 minutes
- Category: Main Dish
- Method: Cooking
- Cuisine: International
Steps to Create Your Olive Garden Breadsticks
- In a small bowl, dissolve the yeast and sugar in warm water. Let it sit for about 5 minutes, or until it becomes frothy. This step always reminds me of the science experiments Ouma and I would conduct in the kitchen, marveling at the process of yeast coming to life.
- In a large mixing bowl, combine the flour and salt. Add the yeast mixture and melted butter. Stir until the dough begins to come together.
- Knead the dough on a floured surface for about 7-10 minutes, until smooth and elastic. Kneading dough always brings me back to standing on a stool next to Mama Lou, my small hands working alongside hers.
- Place the dough in a greased bowl, cover it with a damp cloth, and let it rise in a warm place for about 1 hour, or until doubled in size.
- Preheat your oven to 400°F. Punch down the dough and divide it into 12 equal pieces. Shape each piece into a 7-inch long breadstick.
- Place the breadsticks on a parchment-lined baking sheet. Cover and let them rise again for about 15-20 minutes.
- Bake the breadsticks for 12-15 minutes, or until golden brown. The smell at this point is simply divine, a reminder of the cozy evenings spent in the warmth of family and love.
- While the breadsticks are baking, mix the melted butter, garlic powder, and salt. Brush this mixture over the breadsticks as soon as they come out of the oven.
Tips for Making the Best Olive Garden Breadsticks
To ensure your breadsticks come out perfectly, make sure your water is the right temperature for activating the yeast—not too hot or too cold. A thermometer can be your best friend here. If you want a richer garlic flavor, consider adding a pinch of garlic powder directly to the dough. This little tweak adds a layer of flavor that always takes me back to the adventurous spirit of my youth, trying out new things in the kitchen with Ouma.
Serving Suggestions and Pairings

These breadsticks are the perfect accompaniment to a hearty pasta dish or a steaming bowl of soup. I love serving them with a simple marinara sauce for dipping or alongside a classic alfredo pasta. They also pair wonderfully with a fresh salad, adding a satisfying crunch to the meal. Mama Lou always said bread was the heart of any meal, and these breadsticks prove that true time and again.
Storage and Reheating Tips
To store these breadsticks, wrap them tightly in foil or place them in an airtight container. They’ll stay fresh at room temperature for up to two days. For longer storage, freeze them for up to a month. To reheat, simply pop them in a preheated oven at 350°F for about 5 minutes, or until they’re warmed through. Reheating them brings back the just-baked warmth and aroma, a trick I learned from Mama Lou, who always had a knack for making leftovers feel like a fresh meal.
Frequently Asked Questions
What are the main ingredients for Olive Garden Breadsticks?
The main ingredients for Olive Garden Breadsticks include the items listed in our ingredients section above. Each ingredient plays a crucial role in achieving the perfect flavor and texture.
How long does it take to make Olive Garden Breadsticks?
The total time to make Olive Garden Breadsticks includes both preparation and cooking time. Check the recipe card above for exact timing details.
Can I make Olive Garden Breadsticks ahead of time?
Yes, Olive Garden Breadsticks can often be prepared in advance. Store it properly in an airtight container in the refrigerator and consume within the recommended timeframe.
What can I serve with Olive Garden Breadsticks?
Olive Garden Breadsticks pairs well with various sides and accompaniments. Consider the serving suggestions mentioned in the recipe for the best dining experience.
Is Olive Garden Breadsticks suitable for special diets?
Depending on the ingredients used, Olive Garden Breadsticks may be adapted for various dietary needs. Check the ingredients list and consider substitutions as needed for your dietary requirements.
Final Thoughts
Creating these Olive Garden Breadsticks at home is more than just a culinary exercise; it’s a journey back to the kitchens that shaped my love for cooking. Each step of the process is infused with memories of family and tradition, from the frothy yeast to the final brush of garlic butter. When you bake these breadsticks, you’re not just making a side dish; you’re creating a piece of home, filled with warmth, love, and the joy of sharing good food with the ones we cherish most.